how to use a step drill bit for holes comes down to three things most people overlook: the right bit range, stable workholding, and controlled speed so the cut stays clean instead of grabbing and tearing.
If you have ever tried making a larger hole in thin metal or plastic and ended up with a jagged edge, a warped panel, or a hole that somehow measures “close enough” but not actually right, a step bit is often the simplest fix. It is designed to open holes gradually, which reduces snatching and makes sizing more predictable.
This guide focuses on practical technique: how to choose the correct step bit, how to mark and start accurately, what speed to use, and how to stop on the exact step so your hole fits a conduit, grommet, bolt, or knockout size the first time. I will also flag the cases where a step bit is the wrong tool, because that saves more time than any “hack.”
What a Step Drill Bit Is Best At (and When It Is Not)
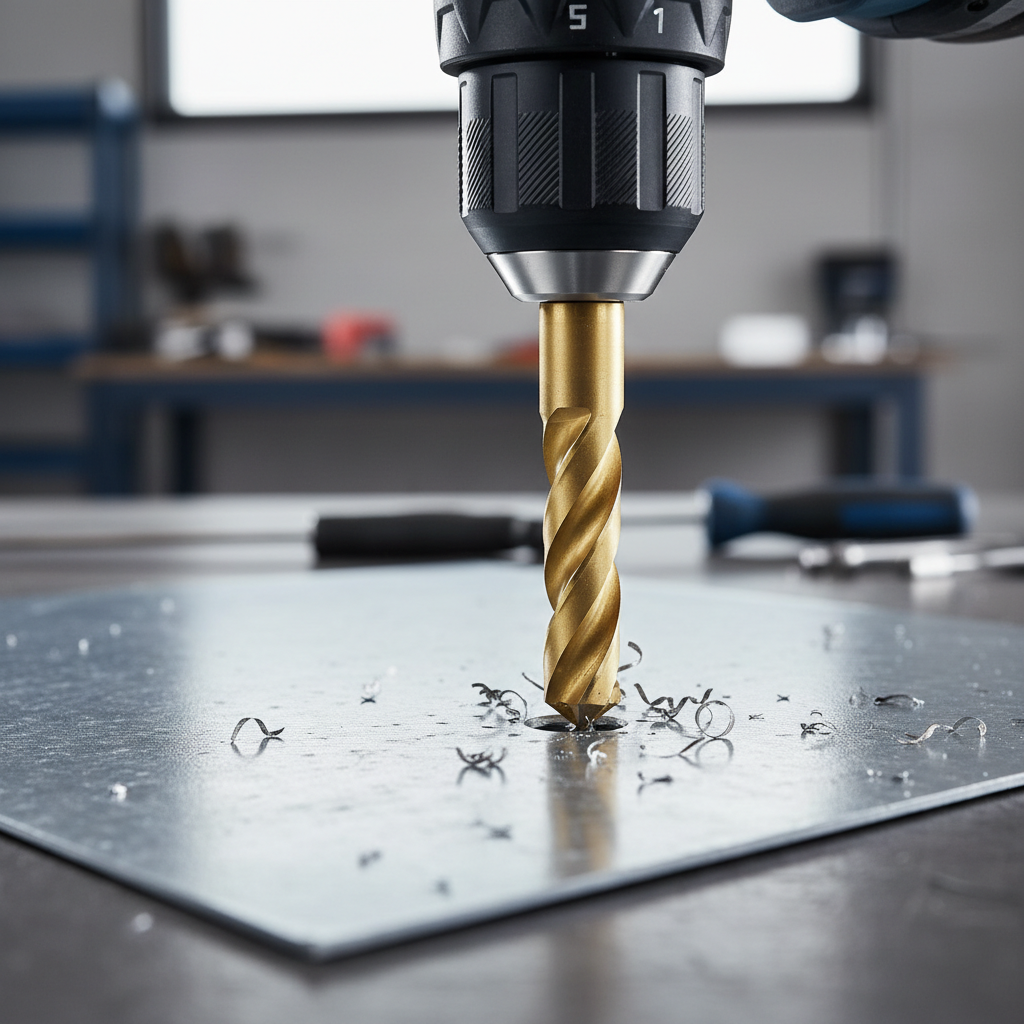
A step drill bit is a cone-shaped bit with distinct diameter “steps.” Each step enlarges the hole to a specific size, and the shoulder between steps helps you stop at a consistent diameter.
- Best use cases: thin sheet metal, electrical boxes, HVAC panels, plastic sheets, fiberglass panels, light-gauge aluminum, and enlarging existing holes.
- Usually not ideal: thick steel plate, deep holes in hardwood, precision reamed holes, or anything that needs a very flat-bottomed counterbore.
In thicker material, the step geometry can rub more than it cuts, which raises heat and dulls edges. In that situation, a standard twist drill, annular cutter, or a hole saw may be a better fit.
Pick the Right Step Bit: Sizes, Materials, and Coatings
Before you drill, confirm the target hole size and the material. Many mistakes happen because the bit has the right “maximum size,” but the wrong intermediate step increments.
Quick selection checklist
- Size range: make sure your target diameter is a labeled step, not “between steps.”
- Step increments: common patterns include 1/16 in or 1/8 in steps; tighter increments help sizing.
- Bit material: HSS works for many jobs; cobalt HSS often holds up better in tougher metals.
- Coating: titanium nitride style coatings can reduce friction, but technique still matters more than color.
If you drill electrical enclosures, pay attention to standard conduit and knockout sizes. It is easy to end up slightly oversized if you do not stop precisely on the right step.
Tools and Setup That Make Step Bits Cut Cleanly
Good setup is the difference between a round hole and a chewed-up oval. This part looks boring, but it prevents the common “bit grabbed and spun the workpiece” moment.
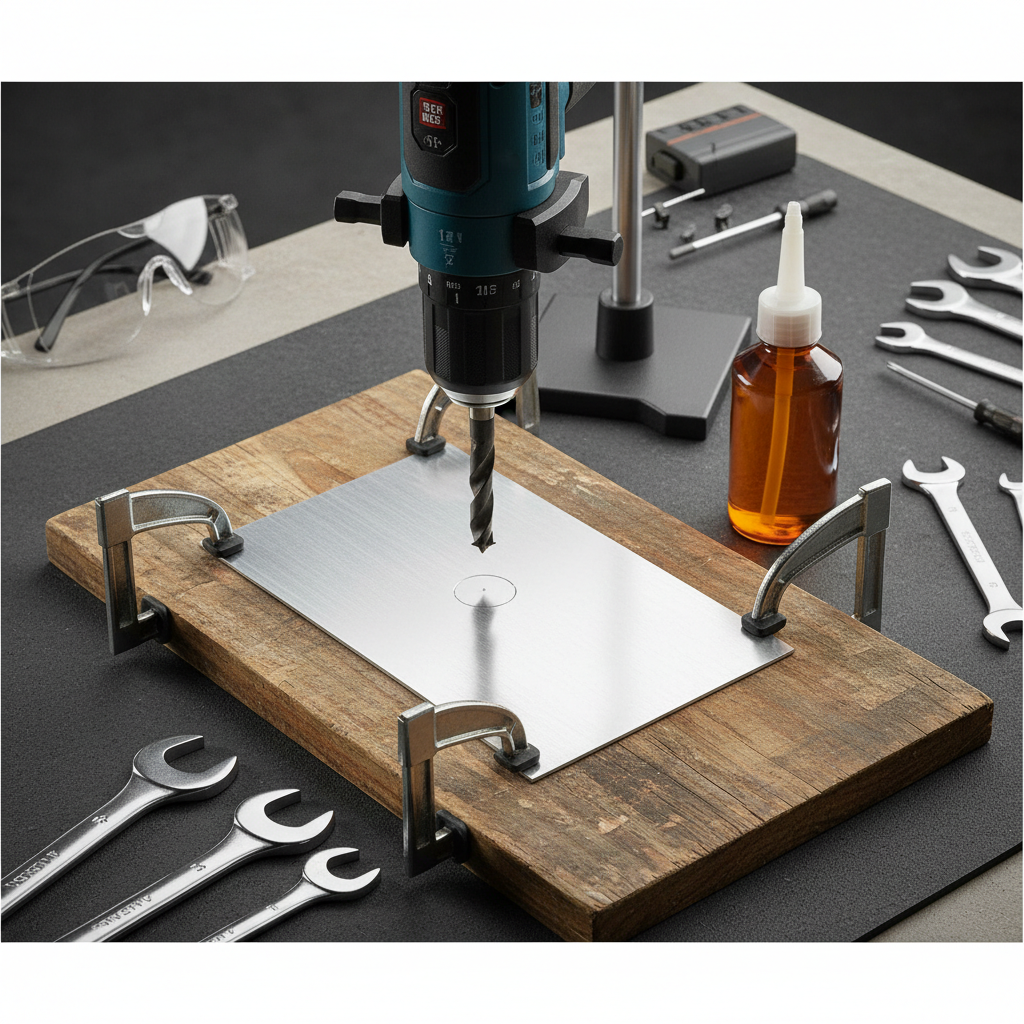
- Drill: a corded drill or quality cordless with a variable-speed trigger helps you keep RPM low.
- Center punch: for metal, a punch mark helps the tip start without skating.
- Clamps or vise: clamp sheet material to a backer board to reduce chatter.
- Cutting fluid: for steel and aluminum, a little lubricant reduces heat and improves finish.
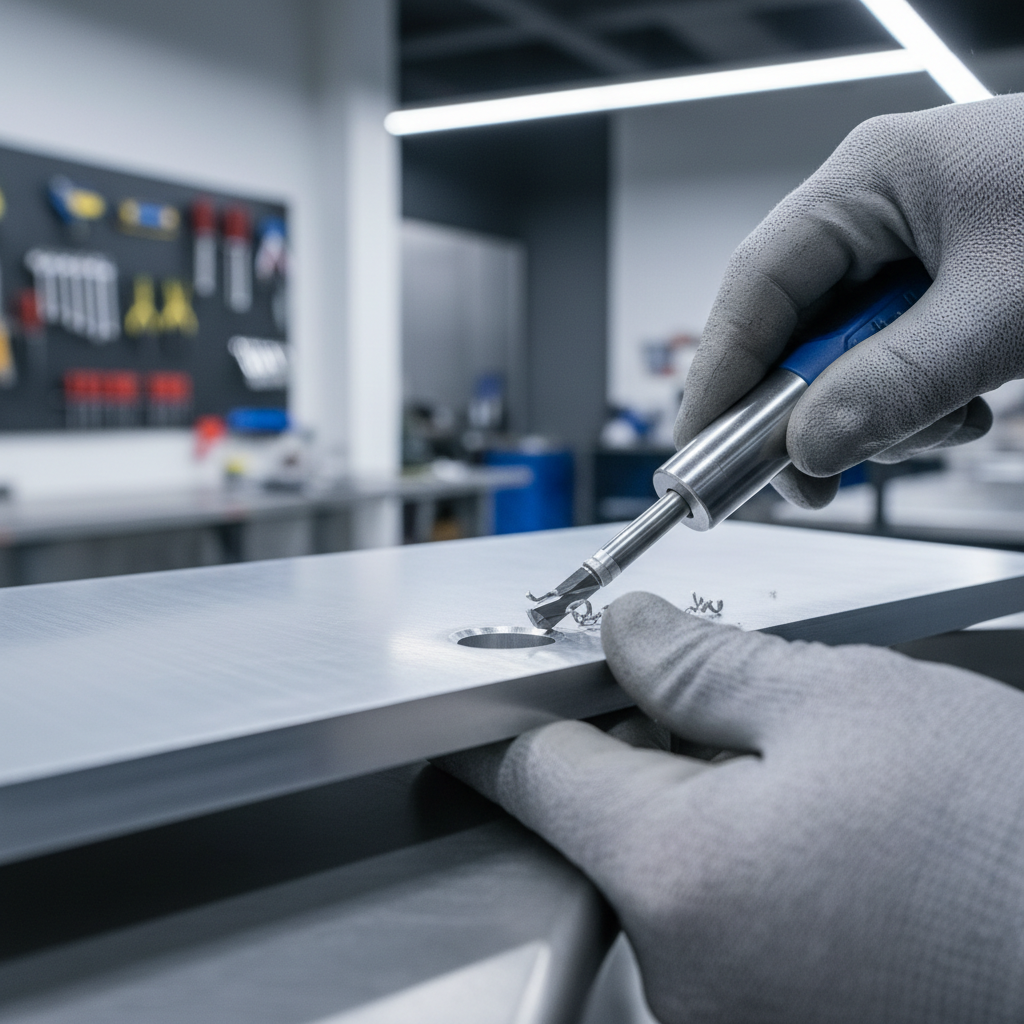
- Deburring tool or countersink: for a clean edge after drilling.
According to OSHA, eye protection is a basic requirement when performing drilling operations because chips and shards can eject unexpectedly, so safety glasses are a reasonable baseline, and gloves may or may not be appropriate depending on the rotating tool and risk of snagging.
One more practical note: step bits like stability. If the sheet can vibrate, the bit will “sing,” heat up, and the hole edge usually looks rough.
How to Use a Step Drill Bit for Holes: The Core Technique
Here is the method that tends to work across metal and plastic, with small adjustments for speed and lubrication.
1) Mark, punch, and pilot only when it helps
- Mark the center with a marker or scribe.
- For metal, add a center punch dent so the tip does not wander.
- Use a small pilot hole only if your step bit has trouble starting, or if your drill lacks low-speed control.
Some step bits start fine without a pilot. The real goal is a stable start, not adding steps “because you always do.”
2) Run slower than you think
Most people over-speed a step bit. In thin metal, high RPM increases heat fast, and once the edge dulls, it starts tearing instead of slicing. Use a lower speed and steady pressure, and let the bit cut.
- Thin steel: low RPM, cutting oil, controlled feed.
- Aluminum: low-to-mid RPM, lubrication helps prevent grabbing.
- Plastic/acrylic: low RPM, very light pressure to avoid melting.
3) Stop on the correct step, then “kiss” the edge
As you drill, you will feel the bit drop into each step. When you reach your target diameter, pause as soon as that step passes through, then ease up and let the shoulder lightly clean the perimeter. That small finish pass often reduces burrs.
If you need repeatable results, use painter’s tape as a visual stop line on the bit, or pick a step with a clearly engraved size marking and keep that marking visible while drilling.
4) Back out to clear chips
Even in thin material, chips can pack in the flutes, raise heat, and scratch the hole. Back the bit out briefly, wipe or blow chips away, then continue.
Material-by-Material Tips (Metal, Plastic, and Wood)
Step bits are versatile, but the “feel” changes with the substrate. These small tweaks prevent the most common defects.
Sheet metal and electrical boxes
- Clamp the work, even if it is “just one quick hole.”
- Use cutting fluid, especially on steel.
- Deburr both sides so connectors seat flat.
Plastic, acrylic, and polycarbonate
- Use lower speed and lighter pressure to reduce melting and chatter.
- Support the back side with a scrap board to prevent breakout.
- If you see stringy plastic, pause and clear chips before heat builds.
Wood (occasional use)
A step bit can enlarge holes in thin wood or plywood, but for clean woodworking holes, spade bits or Forstner bits often leave a better finish. If you do use a step bit, keep RPM moderate and use a backer board to reduce tear-out.
Common Mistakes and How to Fix Them
When a step bit “doesn’t work,” it is usually setup or technique, not the concept.
- Oval holes: workpiece moved or vibrated, clamp tighter and add a backer.
- Ragged edge/burrs: too much speed, dull bit, no lubrication on metal, or pushing too hard at breakthrough.
- Oversized hole: you blew past the correct step, slow down near target and keep your eyes on the step label.
- Bit chatter: drill angle inconsistent, reduce RPM and keep the drill perpendicular.
- Burn marks: heat from rubbing, reduce speed, add cutting oil, clear chips more often.
According to NIOSH, power tools can exceed safe noise levels depending on tool and task, so hearing protection is often a sensible precaution if you are drilling frequently or in enclosed spaces.
Quick Reference Table: Speeds, Lubrication, and Finish Expectations
Exact RPM varies by bit diameter, tool, and material thickness, but this table gives a practical starting point for typical shop tasks.
| Material | Speed approach | Lubrication | Finish tip |
|---|---|---|---|
| Thin steel (sheet) | Low RPM, steady feed | Recommended | Deburr both sides, pause at breakthrough |
| Aluminum | Low-to-mid RPM | Recommended | Clear chips often to reduce grabbing |
| Stainless (thin) | Low RPM, patient feed | Recommended | Stop if heating, let bit cool, avoid rubbing |
| Plastic/Acrylic | Low RPM, light pressure | Usually not needed | Backer board, avoid melting by clearing chips |
| Electrical boxes | Low RPM for control | Optional | Use tape stop for exact conduit size |
Practical Workflow for Repeatable, Accurate Hole Sizes
If you need multiple holes that fit the same grommet or connector, consistency matters more than raw speed.
- Standardize your marking: use a template or spacing jig if holes must align.
- Drill a test hole: use a scrap piece first, especially for plastic and thin aluminum.
- Use a physical stop: tape on the bit, or stop drilling when a specific step is fully through.
- Deburr immediately: burrs can trick you into thinking the hole is too small or too tight.
- Inspect fit, then repeat: once the fit is correct, keep the same trigger pressure and angle.
Key takeaway: the “secret” to clean, correct-size results is slowing down near the target step, supporting the material, and treating heat as the enemy.
When You Should Consider a Different Tool or Ask for Help
If you are drilling thicker steel, structural parts, or anything safety-critical, it may be worth asking a machinist, fabricator, or a qualified tradesperson for guidance on tooling and speeds. A step bit can work in some thicker materials, but mistakes get expensive quickly.
Also consider swapping tools if you need very tight tolerances, perfectly round holes in thick stock, or production-level repeatability. In those cases, a drill press setup, reamer, or punch system often makes more sense than forcing one bit to do everything.
Conclusion: Clean Holes Come from Control, Not Force
Once you get the hang of how to use a step drill bit for holes, it becomes one of those tools you reach for whenever you need a clean opening in thin material without the drama. Clamp the work, start accurately, keep RPM conservative, and stop intentionally on the right step.
If you want a simple next step, pick a scrap piece that matches your project material, drill two test holes at different speeds, then compare edge quality and fit. That quick trial usually teaches more than any chart.