How to apply caulk smoothly with a gun comes down to three things most people underestimate: prep, bead control, and tooling timing, not “having a steady hand.” If your caulk line looks bumpy, leaves gaps, or smears everywhere, it’s usually a setup problem more than a skill problem.
A clean bead matters because caulk is doing real work, keeping water out, stopping drafts, and preventing grime from building up in seams. A rough application can fail early, or just look sloppy enough to bug you every time you walk into the room.
This guide walks through what actually makes caulk lay down smoothly, how to choose the right product and tip cut, and how to fix the common failures like bubbles, skipping, and tearing during tooling.
Pick the right caulk for the job (this affects smoothness)
Before technique, pick a caulk that behaves well in the space you’re sealing. Some products tool like butter, others skin over fast and fight you the whole way.
- Kitchen and bath (wet areas): silicone or siliconized caulk is common, because it resists water better. Pure silicone can be trickier to tool cleanly if you rush.
- Trim and paintable gaps: acrylic latex (often labeled paintable) usually applies and tools smoothly, plus it cleans up with water.
- Big movement gaps: products labeled “flexible” or “elastomeric” handle expansion better, but may need a steadier bead and deeper fill.
According to the U.S. Environmental Protection Agency (EPA), moisture control is a key step to limiting mold growth indoors. In practice, that means using a caulk suited for wet areas, and sealing in a way that avoids voids where water can sit.
Tools and setup that make a smooth bead much easier
You can apply caulk neatly with basic tools, but a couple upgrades make smooth application more repeatable, especially on long runs.
- Dripless caulk gun: helps stop the “ooze” when you release the trigger, which is where many messy blobs come from.
- Razor scraper or putty knife: for removing old caulk and flattening residue.
- Painter’s tape: optional, but great for beginners or high-visibility seams.
- Tooling option: a caulk tool, a gloved finger, or a damp sponge, depending on product and finish.
- Rags/paper towels: keep them within reach, not across the room.
One small habit that helps: stage everything before you start. Caulk often starts to skin over within minutes, so hunting for a towel mid-run is how nice lines turn into smeared ones.
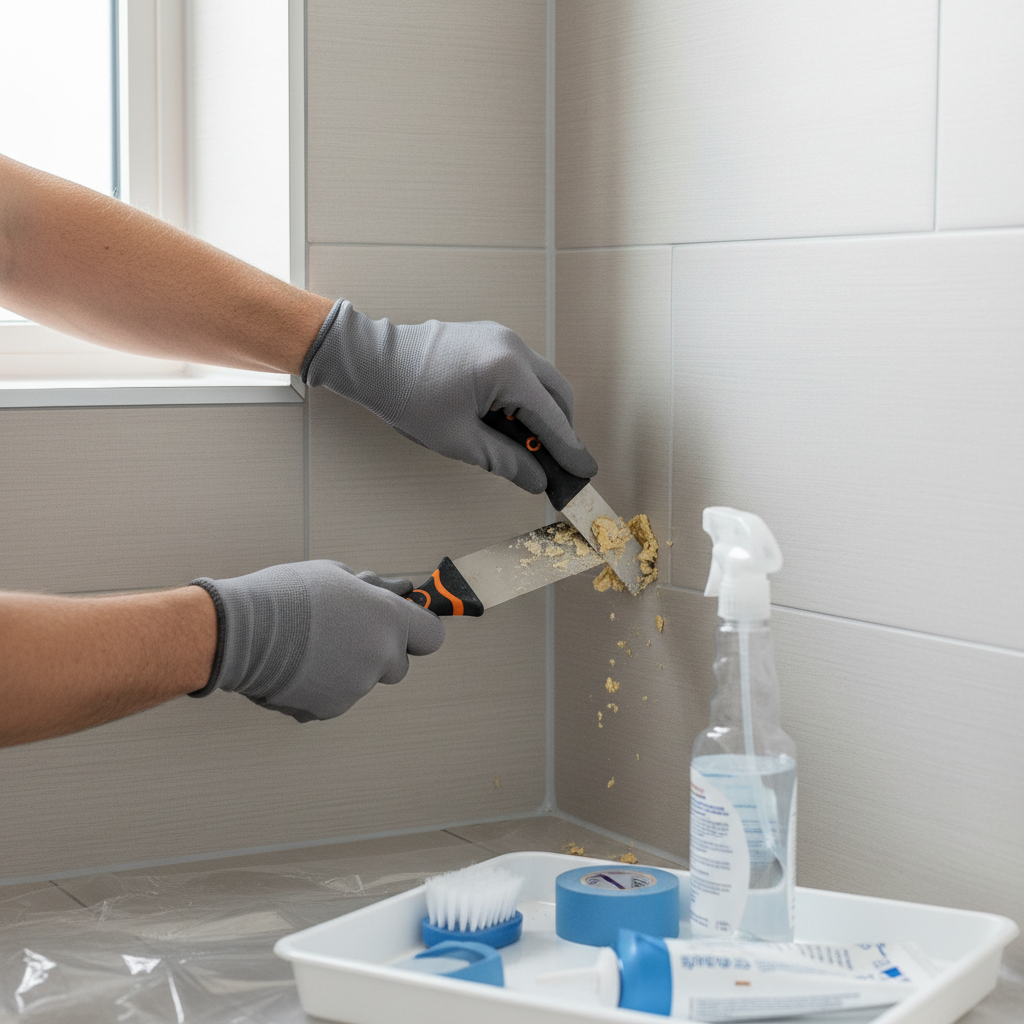
Surface prep: the part people skip, then regret
How to apply caulk smoothly with a gun gets dramatically easier on a clean, dry, solid surface. If old caulk, soap film, or dust stays behind, the bead can skip and lift while you tool.
Prep checklist (fast, but not optional)
- Remove loose or failing old caulk completely where possible.
- Clean residue, soap scum, and oils; let the area dry fully.
- Make sure the gap edges feel solid, not crumbly paint or rotted material.
- For wider gaps, consider backing material (like foam backer rod) so you’re not trying to fill a canyon with caulk.
If you’re working in a bathroom, give it time to dry out. Caulking over damp corners can cause adhesion issues, and in some cases can trap moisture where you don’t want it.
Cut the tip correctly and puncture the seal
Most “my caulk comes out messy” problems start with the nozzle cut. Cut too big and you’re forced to smear excess. Cut too small and you over-squeeze, which creates pulsing and uneven flow.
A practical way to size your cut
- Aim for an opening roughly matching the gap width, usually slightly smaller.
- Cut at a 30–45 degree angle so the tip rides the joint.
- Start smaller than you think; you can always cut a bit more.
Then puncture the inner seal (many tubes have one). If you don’t, pressure builds and releases unevenly, which can create bubbles or sudden surges.
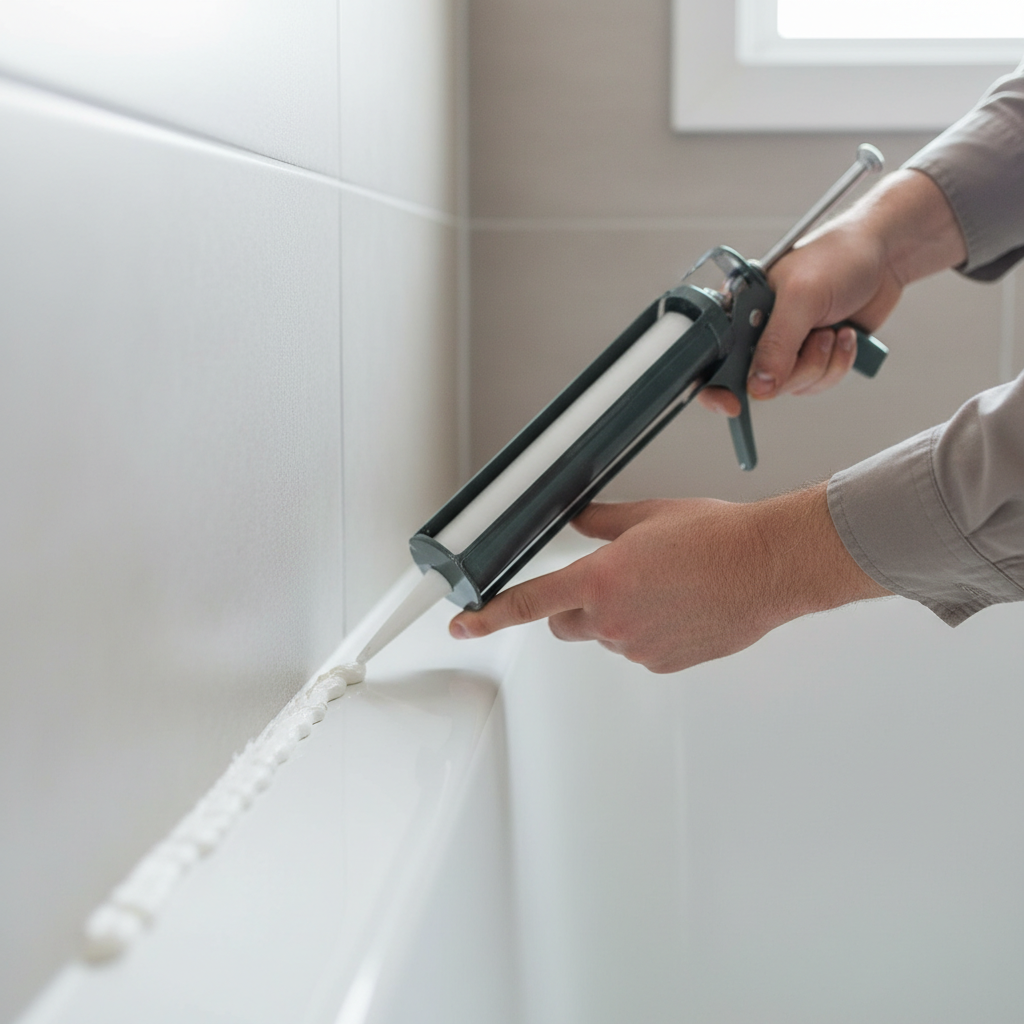
Technique: steady pressure beats “speed” every time
Smooth caulk is mostly about consistent feed and consistent nozzle contact. You’re trying to lay a bead that already looks decent before you ever touch it with a finger or tool.
Step-by-step bead technique
- Hold the gun at a consistent angle, with the angled tip facing the direction you’re moving.
- Keep the nozzle lightly pressed to both sides of the joint, so it “bridges” the gap.
- Squeeze the trigger steadily, think smooth pressure, not repeated bursts.
- Move at a pace that matches flow, if caulk piles up you’re moving too slow, if it skips you’re moving too fast or the tip is too small.
- Stop cleanly: release pressure before lifting the tip away, and if your gun has a thumb release, use it.
Key point: many people “push” caulk, but a lot of pros prefer a gentle “pull” along the joint because you can see the bead forming and keep the nozzle seated.
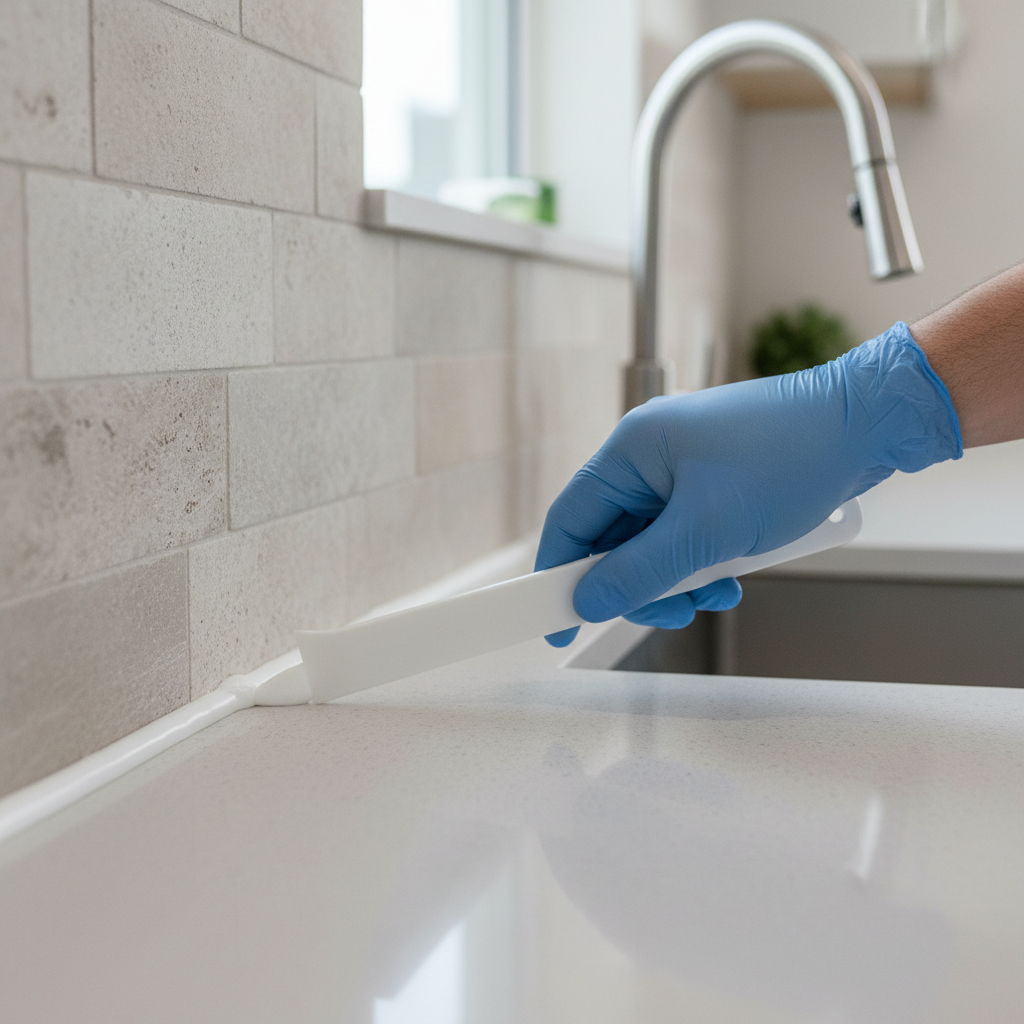
Tooling the bead: when to do it, and what to use
Tooling means shaping the bead so it bonds to both sides and forms a smooth, slightly concave surface. Do it too late and it drags; do it too early and it can slump.
Tooling options (and when they work best)
- Gloved finger: quick and controllable, good for many acrylic latex products.
- Caulk tool/smoothing tool: more consistent radius, helpful for long straight runs.
- Damp sponge: can refine edges on some water-cleanup products, but can over-thin if you get aggressive.
For many paintable acrylic latex caulks, a slightly damp finger works well. For silicone, some people use a dedicated tool to avoid smearing. Always follow the product label, because manufacturers vary on whether water or other aids are recommended.
Painter’s tape: not required, but it can save your sanity
If you care most about crisp edges, tape both sides of the joint, leave the gap exposed, apply the bead, tool once, then pull tape off before the caulk skins over. Tape is especially helpful where the eye lands, like a backsplash or vanity edge.
Troubleshooting: why your bead looks rough (and quick fixes)
If you’re practicing and it still looks wrong, it’s usually one of a few repeat offenders. Fix the cause and your next run will look dramatically better.
- Bead has bumps or “pulses”: inconsistent trigger pressure, or the tube wasn’t seated well in the gun. Slow your squeeze, check the plunger engagement.
- Gaps or skipping: surface contamination, moving too fast, or nozzle not contacting both sides. Re-clean and keep the tip riding the joint.
- Too much caulk everywhere: tip cut too large. Next time cut smaller; for now, remove excess immediately and retool once.
- Smearing while tooling: caulk started to skin over. Work in shorter sections, tool sooner, and keep cleanup supplies right there.
- Edges look ragged after tape removal: waited too long to pull tape, or too much caulk piled against the tape. Pull earlier and use a lighter bead.
Quick reference table: settings that usually work
If you want a simple starting point, this table covers common home scenarios. It won’t replace the product label, but it helps you avoid the usual beginner mistakes.
| Project area | Typical caulk type | Nozzle cut | Tooling approach |
|---|---|---|---|
| Bathtub/shower corners | Silicone (kitchen & bath) | Small-to-medium, 45° | Tool quickly with a caulk tool; avoid overworking |
| Backsplash to countertop | Silicone or siliconized | Small, 30–45° | Tape for crisp line, single smooth tool pass |
| Baseboards/trim (paintable) | Acrylic latex | Small, 45° | Damp finger or sponge, light pressure |
| Window/door interior gaps | Paintable acrylic latex | Small | Short sections, tool right away |
Key takeaways before you start your next bead
- Cut smaller than you think, you can always enlarge the tip.
- Prep and dryness often decide whether caulk lays down smoothly.
- Steady squeeze + steady pace creates a bead that needs minimal tooling.
- Tool once, maybe twice, overworking tends to make lines messy.
Conclusion: a smooth caulk line is mostly process
How to apply caulk smoothly with a gun isn’t a mystery trick, it’s a repeatable routine: choose a caulk that fits the area, prep until the surface feels clean and dry, cut the nozzle small, then run a steady bead and tool it before it skins. If you want one action to take today, practice a 2-foot line on scrap or a hidden seam and adjust your tip cut and pace until the bead looks good before tooling.
If the joint keeps failing, shows ongoing water intrusion, or you suspect hidden damage behind tile or trim, it may be worth asking a qualified contractor for an opinion, especially in wet areas where moisture problems can escalate.