Abrasive pad set scouring is one of those cleaning shortcuts that works incredibly well, until it doesn’t, usually because the pad is too aggressive for the surface or the stain needs a different approach. If you’ve ever scrubbed harder and only ended up with haze, micro-scratches, or a stain that looks “spread out,” you’re not alone.
This topic matters because abrasive pads sit right on the line between “fast results” and “oops, I ruined it.” The same pad that saves a scorched pan can permanently dull a glossy cooktop or a coated sink. Choosing the right pad, pairing it with the right cleaner, and using better technique often makes more difference than elbow grease.
Below is a practical guide for real kitchens, bathrooms, and utility spaces, what to use, what to avoid, and how to get tough stains off without turning the “fix” into a bigger problem.
What an abrasive pad set actually does (and why it works)
Abrasive pads clean by controlled abrasion, they shave off a thin layer of stuck-on residue, oxidation, or mineral scale, along with a bit of whatever is underneath if you’re not careful. That’s why they feel so effective on baked-on grease and ring stains.
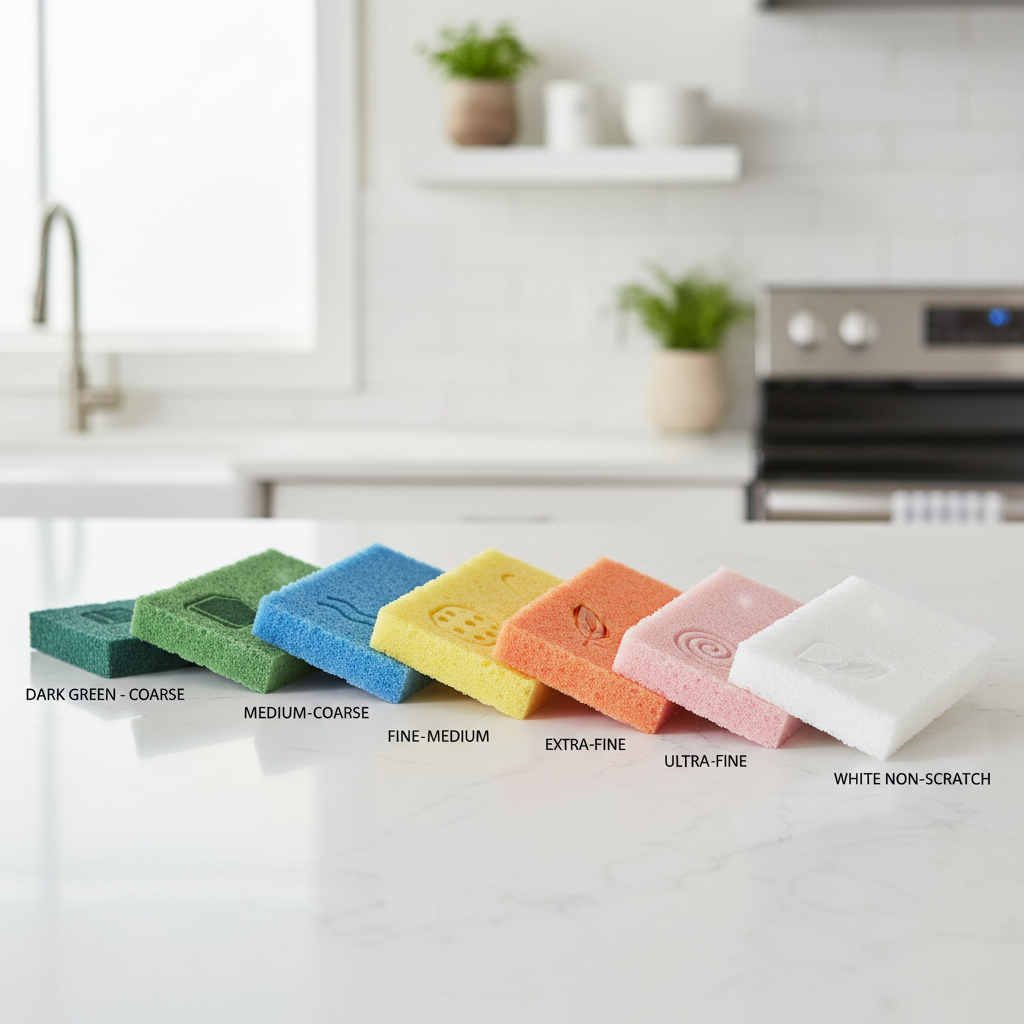
Most sets include several grit levels. Brands label them differently, but the idea stays the same: lighter pads are meant for daily grime, heavy-duty pads are meant for stubborn build-up on durable surfaces.
- Light duty: gentle scrubbing for nonstick-safe tasks, light soap scum, everyday mess.
- Medium duty: cooked-on food on stainless (not polished), sink stains, some grout haze.
- Heavy duty: char, heavy scale, rust spots on certain metals, shop tasks, often too harsh for “pretty” surfaces.
If you take one thing from this section, it’s this: the pad isn’t just “cleaning,” it’s also “finishing.” You’re changing the surface texture, even if it’s microscopic.
Common causes of “tough stains” that need scouring
“Tough stain” is a catch-all. In practice, you’re usually dealing with one of a few categories, and each responds to different pressure, dwell time, and chemistry.
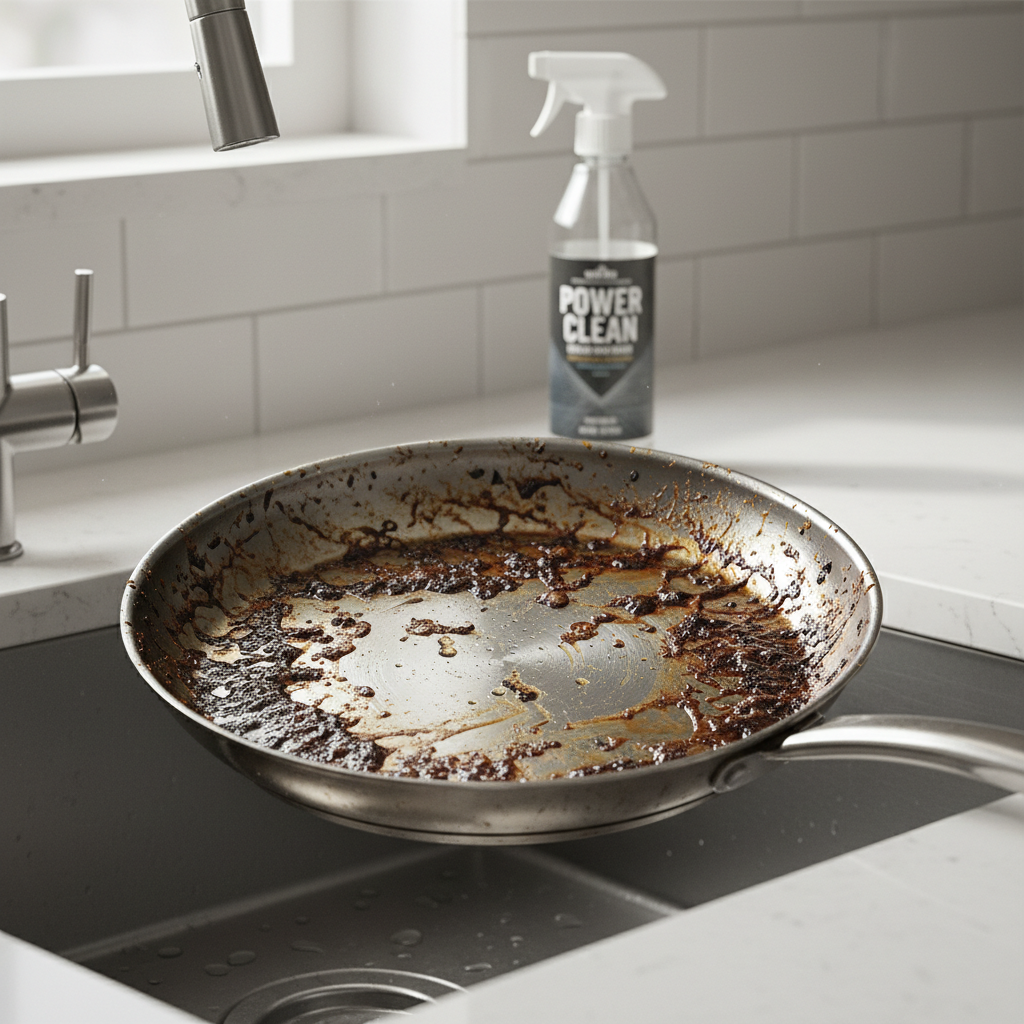
- Baked-on grease and carbon: pans, oven racks, grill grates, usually needs degreaser + time, not just force.
- Mineral scale: white crust around faucets, shower doors, kettles, responds better to acid-based descalers (used safely) than heavy abrasion.
- Soap scum: bathroom tile, tubs, a mix of oils + minerals, often needs a surfactant cleaner and light scouring.
- Rust transfer: orange marks on porcelain or stainless, sometimes from metal cans or tools, may need a rust remover and a gentle pad.
- Dye/pigment: coffee/tea stains, some plastics, can smear if you scrub dry, pre-wet and use the least aggressive option.
According to the U.S. Environmental Protection Agency (EPA), it’s important to follow label directions on cleaning products, especially regarding contact time, ventilation, and surface compatibility. That advice applies even more when you add abrasion into the mix.
Quick self-check: which pad should you start with?
When you’re unsure, start gentler than your instincts. Many surfaces look tough but have coatings, polishing, or clear layers that scratch easily.
Surface safety checklist
- High-risk surfaces: nonstick cookware, acrylic tubs, polished stainless, glass cooktops, clear-coated fixtures, soft plastics. Start with light duty or skip abrasion.
- Usually scouring-friendly: uncoated stainless sinks, cast iron (seasoned care needed), unglazed tile, some porcelain (test first).
- If it has a sheen: treat it like it scratches easily, even if it feels hard.
Stain behavior checklist
- Feels raised (you can catch a fingernail): scouring may help, use cleaner + light pressure.
- Feels flat (discoloration): more abrasion often won’t help, consider a targeted cleaner.
- Comes back quickly: likely scale or residue film, switch chemistry and rinse better.
Also, if your goal is “looks new,” be cautious. Abrasive pad set scouring can remove stains while leaving a uniform dullness that only shows under certain lighting, which drives people crazy later.
How to scour tough stains without damaging the surface
The technique that works in real life is slower at the start and faster at the end, because you let chemistry do the softening, then you use minimal abrasion to lift what’s left.
A practical step-by-step
- Pre-rinse or pre-wet: dry scouring raises scratch risk and spreads grime.
- Apply the right cleaner: degreaser for grease, descaler for mineral deposits, mild abrasive cleanser for some sink stains. Let it sit briefly if the label allows.
- Pick the least aggressive pad: test in a hidden spot, especially on glossy finishes.
- Use light, consistent pressure: think “erase,” not “sand.”
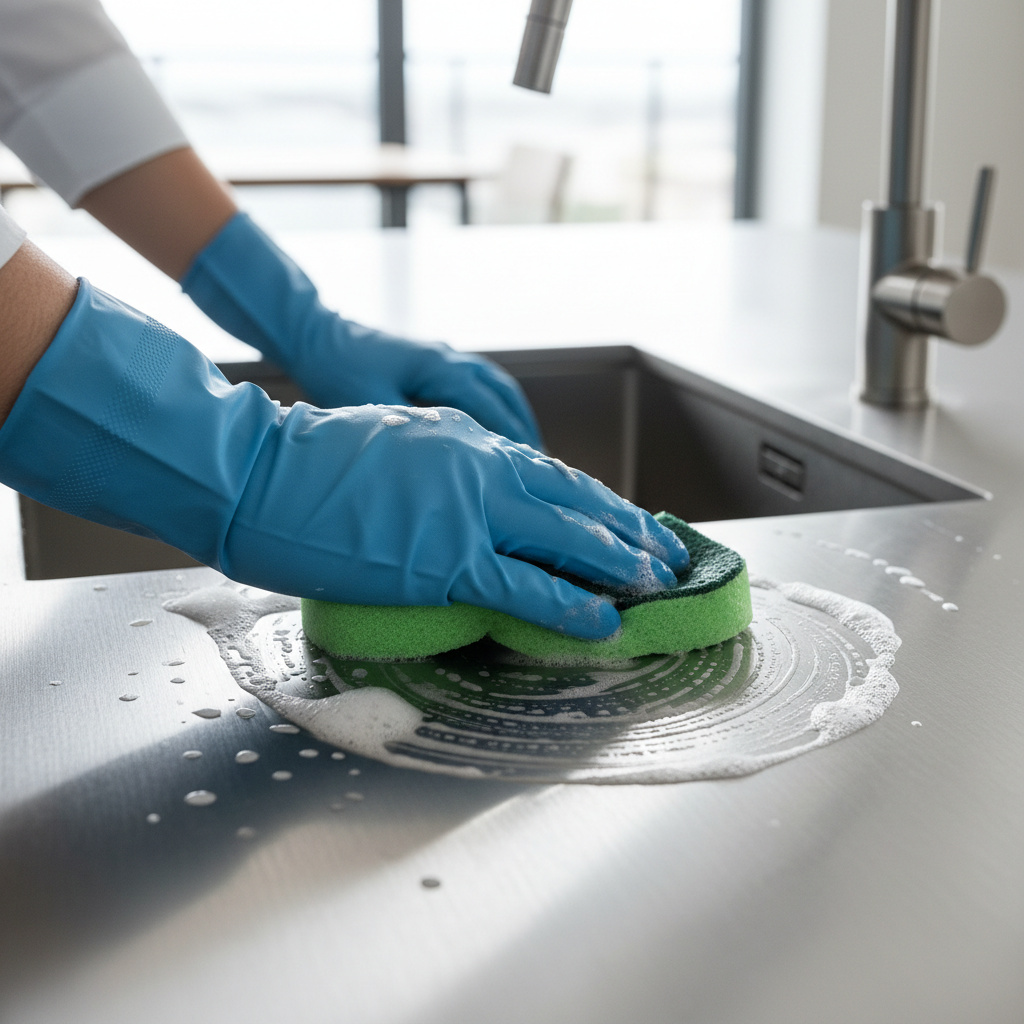
- Scrub with the grain: on brushed stainless, follow the lines to avoid crosshatch marks.
- Rinse, then inspect under angled light: don’t keep scrubbing just because it’s wet and looks better.
- Finish with a soft cloth wipe: remove residue film so you can see the real result.
According to the Centers for Disease Control and Prevention (CDC), using appropriate gloves and ensuring good ventilation can reduce exposure to cleaning chemicals. If you’re pairing pads with strong cleaners, that’s a sensible baseline.
Pad choice guide: match grit to the job (table)
Labels vary by brand, so treat this as a starting point, not a promise. When in doubt, go one step gentler.
| Task | Suggested pad level | Cleaner pairing | Notes |
|---|---|---|---|
| Stainless sink discoloration | Light to Medium | Mild abrasive cleanser or dish soap | Follow grain, rinse well to avoid haze |
| Burnt pan bottom (stainless) | Medium | Degreaser or baking soda paste | Soak first, let chemistry soften the layer |
| Soap scum on tile | Light | Bathroom cleaner | Check grout sealer condition, don’t over-scrub |
| Hard water spots on glass shower door | Usually avoid heavy scouring | Descaler (surface-safe) | Test first, abrasion can permanently haze glass |
| Grill grates (uncoated) | Heavy | Degreaser | Confirm grate material and coating before scrubbing |
Mistakes that waste time (or create scratches)
Most “abrasive pads ruined my sink” stories follow the same script: wrong surface, too much pressure, or the pad used like sandpaper without lubrication.
- Starting with the harshest pad: you can’t un-scratch a glossy finish without refinishing.
- Scouring dry: increases friction, heat, and visible swirl marks.
- Mixing chemicals casually: some combinations can release irritating fumes, if you’re unsure, don’t combine, rinse between products.
- Ignoring contact time: many stains lift when cleaner sits briefly, aggressive scouring is often a substitute for patience.
- Not rinsing grit away: loosened particles can become the “abrasive” and keep scratching.
Key takeaway: abrasive pad set scouring is safest when it’s the finishing step after softening the mess, not the opening move.
When to stop DIY and get help (or switch tools)
Some problems look like “stains” but are actually wear, etching, or coating failure. In those cases, more scouring just makes the damage easier to see.
- Stone counters (marble, limestone): acids can etch, abrasives can dull, consult a stone pro or follow the manufacturer’s care guide.
- Glass cooktops: typically require purpose-made cleaners and scrapers, pads can scratch, check appliance manual.
- Nonstick cookware: if the coating looks peeling or rough, stop and consider replacement, ingestion risk is a medical question, so ask a professional if concerned.
- Persistent rust: could be from water quality or underlying corrosion, you may need a plumber or maintenance tech.
According to the American Cleaning Institute (ACI), reading product labels and using tools as directed helps protect both surfaces and users. If a surface is expensive or hard to replace, that small pause to verify compatibility is worth it.
Conclusion: a smarter way to win against tough stains
Abrasive pad set scouring works best when you treat it like a controlled process: identify the stain type, soften with the right cleaner, start gentle, and stop as soon as the job is done. That approach usually gets you cleaner results with fewer “why does it look worse now?” surprises.
If you want an easy next step, pick one problem area, do a small test spot with your lightest pad, then move up only if needed, you’ll learn more in five minutes than you will from guessing.
FAQ
What surfaces should I avoid with an abrasive pad set?
Usually avoid glossy, soft, or coated surfaces like nonstick cookware, acrylic tubs, and glass cooktops. If you can’t confirm the finish, test a hidden area and start with the least aggressive pad.
Is abrasive pad set scouring safe for stainless steel sinks?
Often yes for brushed stainless, but technique matters. Scrub with the grain, keep the surface wet, and avoid heavy-duty pads unless you accept a more matte finish.
Why does my sink look cloudy after scouring?
Cloudiness can come from micro-scratches or residue film from cleanser and minerals. Rinse thoroughly, wipe dry, and consider a stainless polish if the manufacturer recommends one.
Do I need a cleaner, or can I just use water and a pad?
Water helps, but many tough stains respond better when a cleaner breaks bonds first. In many kitchens, letting dish soap or a degreaser sit briefly reduces how abrasive you need to be.
How do I choose between light, medium, and heavy pads in a set?
Start light, then move up only when the stain doesn’t budge after a short, controlled attempt. If the surface starts changing sheen, that’s your cue to stop or switch methods.
Can abrasive pads remove hard water stains from shower glass?
Sometimes, but it’s risky because abrasion can haze glass. Many people get better results using a glass-safe descaler and a non-abrasive scrubber, test first.
How long should I scrub before switching strategies?
If nothing changes after a minute or two with proper cleaner and light pressure, brute force rarely helps. Change the chemistry, increase dwell time if safe, or move to a different tool like a scraper designed for that surface.
If you’re trying to set up a more reliable cleaning routine, a well-chosen abrasive pad set can be the “problem-solver” tool in your cabinet, just pair it with a simple rule: test, start gentle, and let the cleaner do the heavy lifting before you scour.