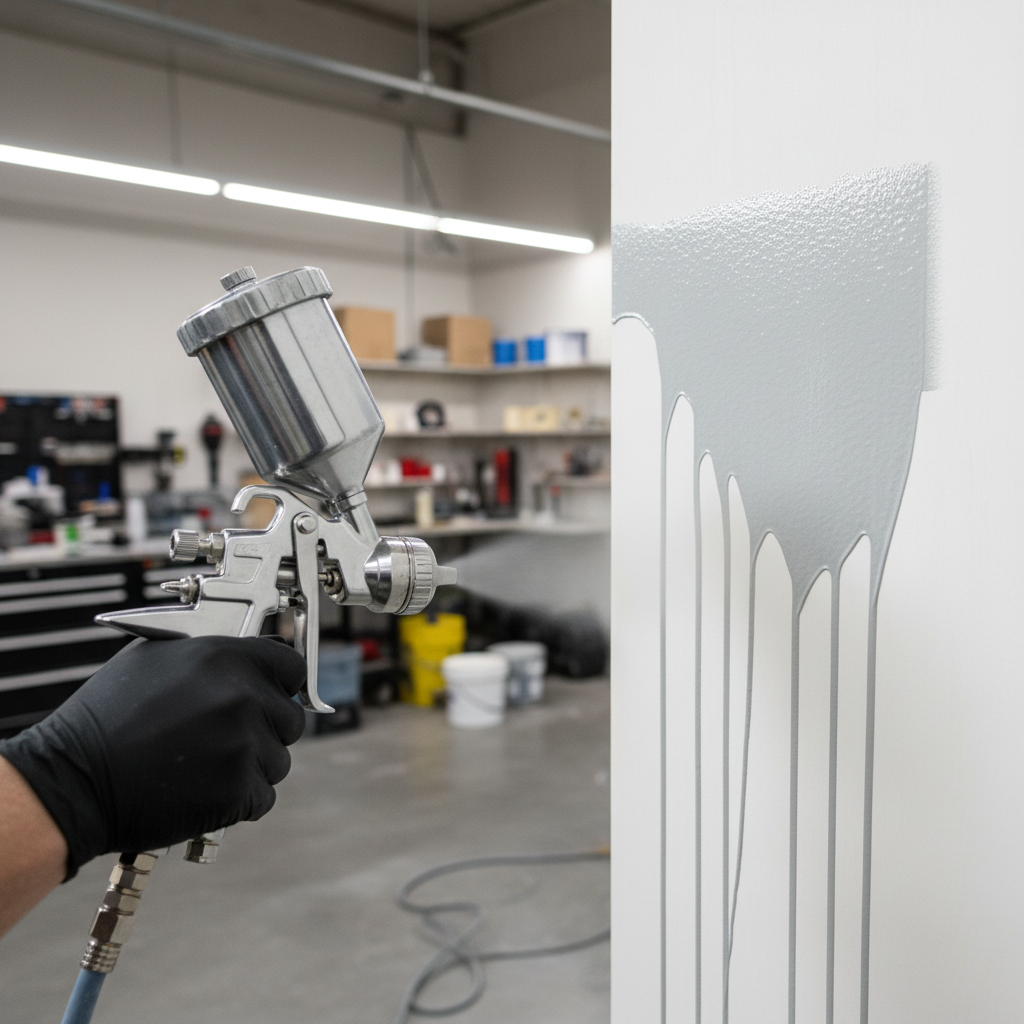
how to use a paint sprayer without runs comes down to one unglamorous truth: most drips happen before you ever pull the trigger, either from a bad setup, the wrong viscosity, or moving the gun like a flashlight instead of a tool that lays down wet film.
If you have ever stepped back and seen curtains, sags, or little “teardrops” on corners, you already know how frustrating this is, it feels like the sprayer is “too powerful,” but in many cases the sprayer is doing exactly what you asked it to do.
This guide breaks the process into the few variables that actually matter: surface prep, material thickness, tip choice, pressure, distance, speed, and overlap. You will get a quick self-check, a practical table for settings, and a workflow you can repeat on cabinets, doors, trim, fences, and walls.
Why runs and drips happen (the real causes)
Runs are not random, they show up when too much paint lands in one spot, stays wet, and gravity wins. The tricky part is that “too much” can come from several different mistakes that look similar afterward.
Common run triggers you can usually trace back to technique or setup:
- Spraying too close or slowing down near the end of a pass, paint stacks up and starts to sag.
- Overlapping too much, especially on edges, corners, and panel grooves where paint naturally gathers.
- Wrong tip size, a tip that flows too much product for the coating and surface pushes you into heavy wet coats.
- Pressure too high on an airless, or fluid/air balance off on an HVLP, which can increase output or bounce-back that you “fix” by spraying extra.
- Paint too thin for vertical work, it levels fast but also slides fast.
- Dirty tip, worn tip, or partial clog, the fan distorts and you unconsciously correct by lingering.
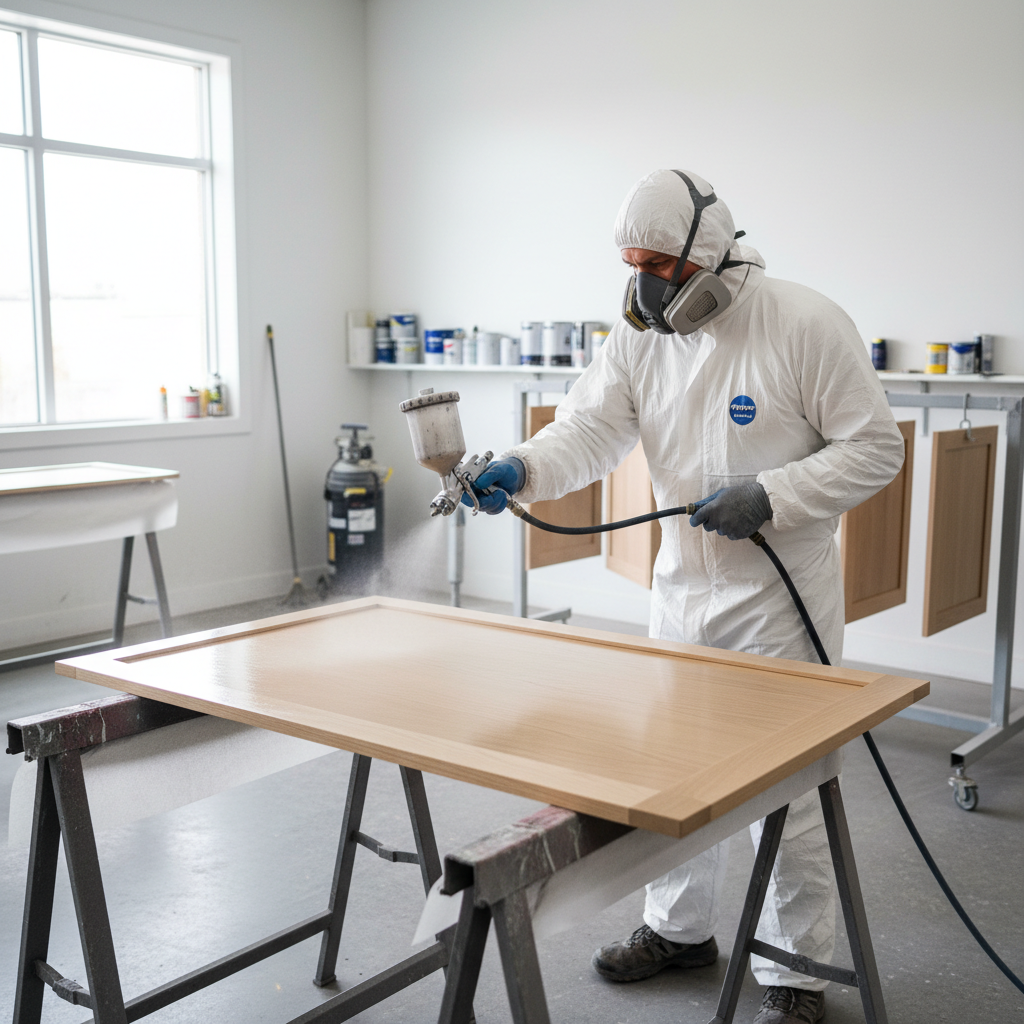
According to OSHA, sprayer work also introduces overspray and inhalation risk, so ventilation and proper PPE matter even for small projects. If you feel unsure about a coating’s hazards, check the product SDS and consider asking a paint retailer or a safety professional.
A quick self-check before you spray (60 seconds)
Before you start chasing technique videos, identify which bucket you fall into. Most people have one dominant issue, not ten.
- Runs show up mostly on vertical faces: your coat is too wet, either from speed/distance/overlap or paint viscosity.
- Runs show up on edges and corners: you are double-hitting edges, often from starting/stopping on the work or fanning your wrist.
- Random heavy spots and “tails”: the fan pattern is uneven, think tip wear, clog, or wrong pressure.
- Orange peel plus occasional drips: you are trying to fix texture by spraying heavier, but the real fix is tuning atomization and distance.
- Perfect at first, worse later: tip starts to clog, filters load up, or material warms and flows differently.
If your problem is “I can’t tell what wet enough looks like,” do one simple test panel and write down the distance, pressure setting, and tip. That note becomes your baseline for the rest of the project.
Dial in your sprayer setup: tip, pressure, and material
How to use a paint sprayer without runs starts with controlling flow. You want the smallest tip and lowest pressure that still gives a clean, even fan with no fingers or spitting.

Use this table as a starting point (adjust by product label)
Every coating behaves differently, and manufacturers often publish recommended tip sizes and thinning guidance. Start there, then fine-tune with a test spray.
| Project/Coating (typical) | Sprayer type | Starting tip/orifice idea | Run risk notes |
|---|---|---|---|
| Interior walls (latex) | Airless | ~0.015–0.017 | Keep moving, avoid “touch-up” passes while wet |
| Trim/doors (waterborne enamel) | HVLP or fine-finish airless | Smaller output, follow product guidance | Runs often happen on edges and profiles |
| Cabinets (primer + enamel) | HVLP | Match needle/nozzle to coating | Too much material makes “curtains” fast on vertical doors |
| Fence/deck stain | Airless | Lower output than thick paint | Stain can look fine, then drip from knots and edges |
Practical rule: if you must slow way down to keep coverage even, your output is too low. If you must speed-walk to avoid drips, your output is too high.
Viscosity: thin only when it solves a specific problem
Thinning can reduce orange peel and help atomization, but it can also increase sagging on vertical work. Many modern waterborne paints are designed to be sprayed without thinning, or with limited adjustments, so treat the label as your “guardrails.”
- If the finish looks dry and dusty, you may need slightly more fluid, slightly less air, or a touch less distance.
- If the finish looks glossy-wet and starts creeping downward, back off fluid/output before you thin further.
Spraying technique that prevents runs (distance, speed, overlap)
Most run fixes are boring: keep the gun square, keep a consistent distance, and overlap on purpose instead of guessing. When you feel rushed, your wrist starts to arc, and that changes distance mid-pass, the surface gets a heavy stripe in the middle and lighter edges.
Distance and angle (the “square and steady” rule)
- Hold the gun perpendicular to the surface, not fanned like a garden hose.
- Keep distance consistent through the full pass, don’t dip closer at the end.
- Move your whole arm, not just your wrist, especially on doors and panels.
Overlap and pass planning
- Aim for about 50% overlap on most flat areas, then reduce overlap near edges to avoid double-build.
- On corners and trim profiles, do a light “edge pass” first, then the main face pass, not two full wet coats on the corner.
- Keep a “wet edge,” but avoid chasing tiny dry spots while the coat still flows.
Trigger control that stops heavy spots
- Start moving, then pull the trigger. Release the trigger before you stop moving.
- Do not start or stop a pass on the workpiece if you can avoid it, overspray your start/stop off the edge.
- If your sprayer has adjustable fluid, use it, runs often disappear when you reduce output one notch.
Step-by-step workflow for a smooth coat (with fewer do-overs)
If you want repeatable results, treat spraying like a short checklist, not a vibe. This is the workflow many pros rely on because it reduces “surprises” halfway through.
1) Prep and masking (where runs often start)
- Clean and degloss as needed, contaminants can make paint “pull away” and tempt you to overspray.
- Sand to the coating system’s recommendation, then remove dust thoroughly.
- Mask so you can spray past edges without panic stops.
2) Test spray and adjust (two minutes that save an hour)
- Spray a piece of cardboard or scrap with the same orientation as your project.
- Look for a full fan, even distribution, and a wet look that levels without sliding.
- Adjust one variable at a time: output, pressure/air, then distance and speed.
3) Spray pattern order (especially on doors and trim)
- Do details and edges with a lighter pass, then cover the main face.
- Keep your last pass on the “show side” consistent, avoid one extra swipe “just in case.”
4) Dry time and recoat timing
Recoat too soon and you can soften the layer under it, which increases sag risk. Follow the label for dry-to-touch and recoat windows, and remember temperature and humidity can stretch those times.
Key point: if you are fighting runs, a slightly lighter first coat that flashes off well often beats one heavy coat, even if it takes an extra pass later.
Fixing runs while wet vs after dry
Even when you know how to use a paint sprayer without runs, one drip can still show up, usually on a corner you walked past too slowly. The fix depends on timing.
If you catch it wet
- Do not blast it with more paint, that usually makes a bigger sag.
- If the coating allows, lightly back-roll or tip off with a brush, then leave it alone.
- If you must respray, wait for it to flash a bit, then apply a lighter, controlled pass over a broader area.
If it dried
- Let it cure enough to sand without gumming up, follow the product guidance.
- Level the run with fine sanding or a run razor tool, then feather the edges.
- Spot-prime if you cut through, then respray a light coat to blend.
Safety and cleanup: less mess, fewer problems next time
Spraying creates airborne mist and overspray. According to EPA guidance on paint and coating use, ventilation and following product label instructions help reduce exposure risks and indoor air issues, so open airflow, consider a respirator rated for the coating type, and keep ignition sources away from flammable products.
- Use eye protection and gloves, and choose respiratory protection appropriate for the coating and solvent type, a paint store can often help match cartridges.
- Strain paint when recommended, small debris can cause spitting that turns into runs.
- Clean filters and tips right after use, a partially clogged tip ruins pattern consistency on the next job.
Key takeaways (keep these in your head while spraying)
- Runs come from excess wet film, reduce output or speed up before you chase thinning.
- Consistency beats intensity, same distance, same speed, same overlap.
- Edges need less paint than faces, plan your pass order to avoid double-build.
- Test panels are not optional if you are switching coatings, tips, or sprayer types.
Conclusion: a smoother finish is mostly controllable
How to use a paint sprayer without runs is less about “talent” and more about removing the reasons paint piles up, choose the right tip, lower output until the fan still looks clean, keep the gun square, and treat edges like a separate, lighter step.
If you want one action to take today, spray a vertical test board and adjust until you can complete a full pass without slowing down or speeding up to avoid drips, once that feels steady, your project usually follows.