The best tape measure for accurate readings is the one that stays consistent in your hands, on your material, and across repeated pulls, not just the one with the most marketing claims.
If you have ever cut a board “to the line” and still ended up short, you already know the pain point, tiny measurement errors stack fast, especially when you transfer marks, measure alone, or work from awkward angles.
This guide narrows what actually drives accuracy in 2026, which features matter by use case, and how to sanity-check a tape in under five minutes at the store or on a jobsite.

What “accurate” really means for a tape measure
Accuracy is not only about the printed graduations, it is about how reliably you can read, hook, pull, and repeat. A tape can be perfectly printed and still betray you if the hook wobbles, the blade kinks, or the standout collapses right when you need a solo measurement.
There are also two different ideas people mix up:
- Precision: how fine the markings are and how easy they are to read, especially at 1/16 or 1/32.
- Repeatability: whether you get the same result after multiple pulls, on different days, and with different users.
For U.S. buyers, most consumer tapes are not sold with a formal traceable calibration certificate, so your practical goal is repeatability and easy reading in your environment.
According to NIST (National Institute of Standards and Technology), measurement reliability depends on both the instrument and the method, which is a polite way of saying your tape and your technique share the blame when cuts miss.
Key features that most affect accurate readings
When people hunt for the best tape measure for accurate readings, they often obsess over standout or brand, but these details usually swing outcomes more.
1) Hook design and “true zero” movement
The end hook should slide slightly, that movement compensates for inside vs outside measuring. The problem is excessive play, bent rivets, or a hook that is no longer square.
- Look for a hook that moves smoothly, with minimal side-to-side wiggle.
- Prefer reinforced or thicker hooks if you drop tools often.
- If you do finish carpentry, a sloppier hook becomes visible fast.
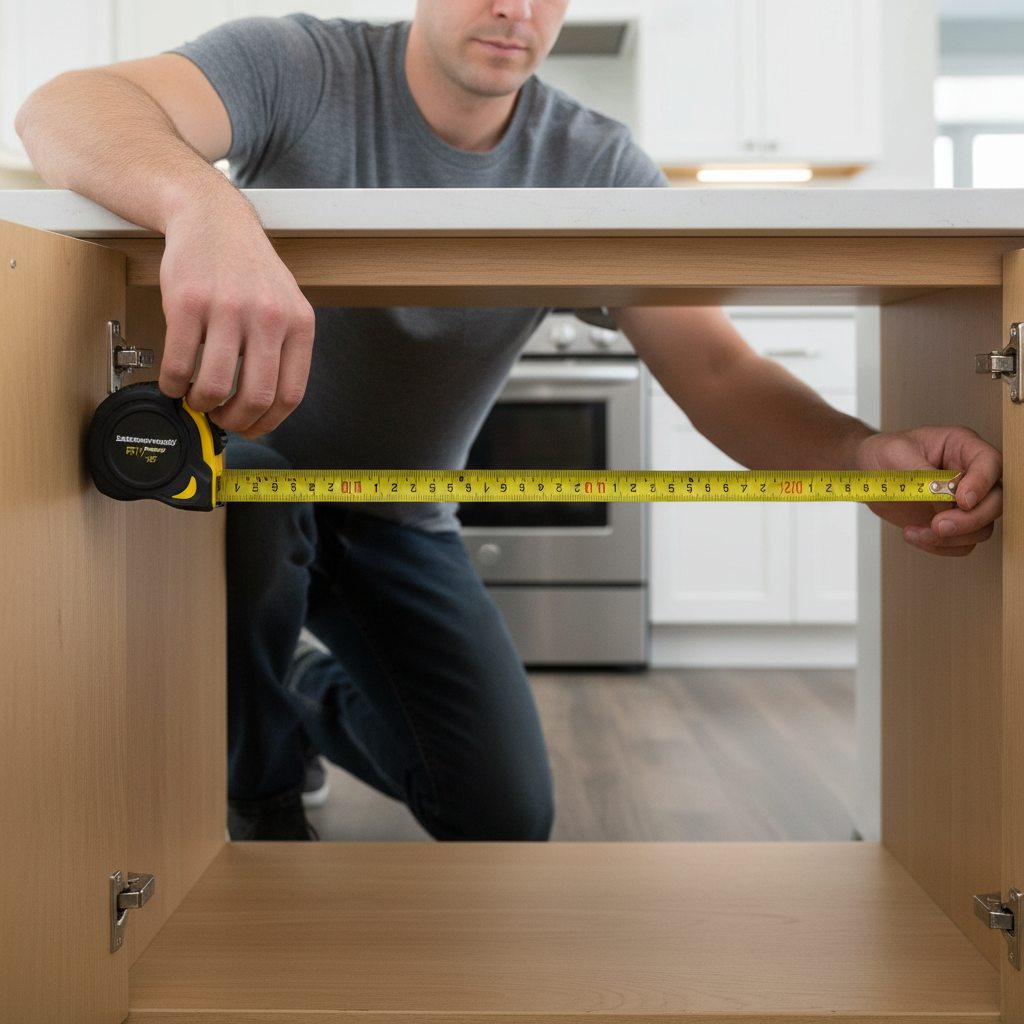
2) Blade stiffness and standout (for solo measuring)
If the blade collapses early, you start “helping” it with your hand, which changes the angle and invites parallax errors, especially on longer pulls.
- Wider blades often feel easier to control, but can feel bulky in tight cabinets.
- Coating quality matters, a blade that wears quickly loses legibility, and that is accuracy in real life.
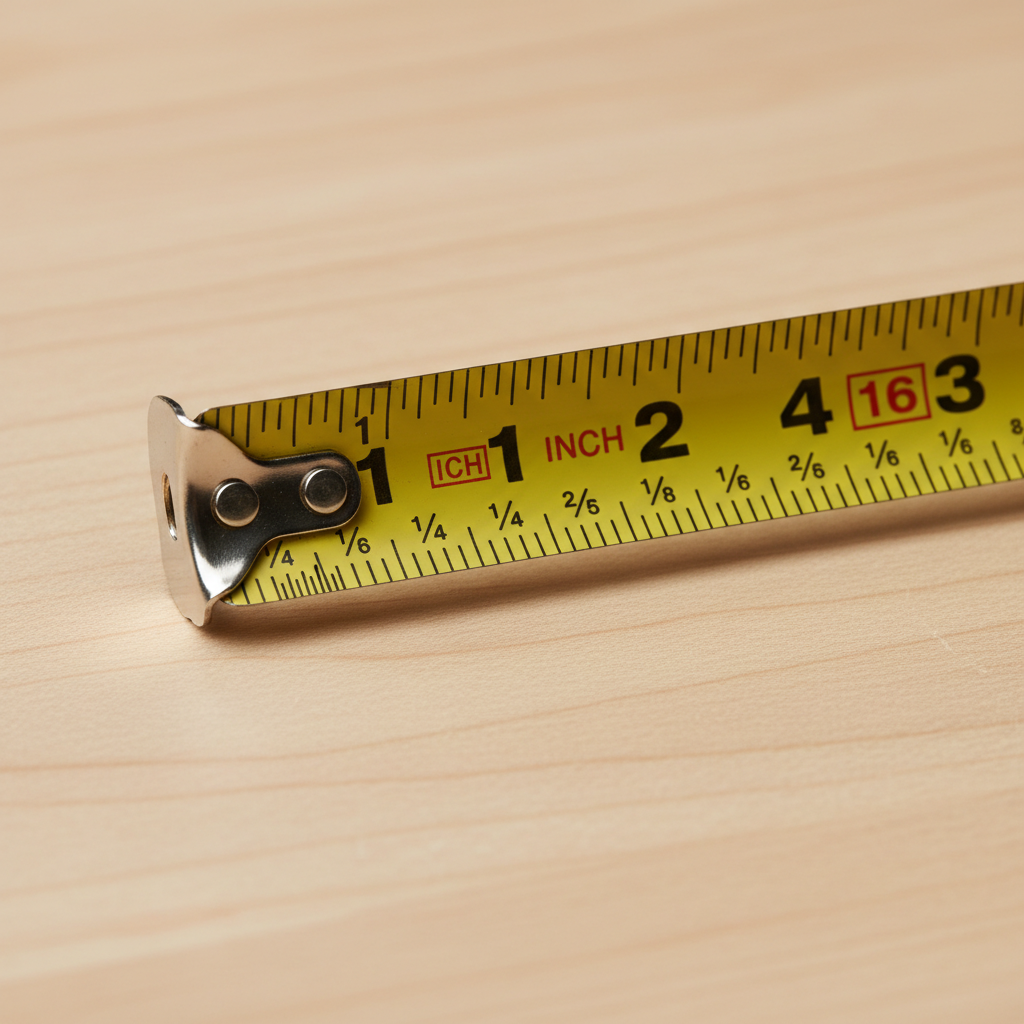
3) Graduation clarity and labeling choices
Clear, high-contrast markings reduce misreads more than people admit. In dim garages or bright sun, your eyes will prefer certain styles.
- Bold 1-foot markers and strong 1/8 labels help when you are moving fast.
- “Architectural” tapes (feet-inches) can speed layout, but can also confuse if your team expects standard inches.
4) Case stability and lock feel
A mushy lock encourages micro-slips while you mark, and those slips often show up as “mystery” errors later. You want a lock that holds without shredding the blade coating over time.
Quick self-check: are your measurement errors from the tape or from technique?
Before you buy anything, it helps to know what problem you are solving. Many “bad tape” complaints are actually reading angle, marking tools, or inconsistent hook pressure.
- Your cut is consistently short: often a marking or kerf assumption issue, sometimes a bent hook.
- Your cut is randomly off: usually technique, blade sag, or reading angle.
- Inside measurements are always wrong: hook movement may be sticky, or you are not using the case length consistently.
- Long measurements drift: standout collapse, blade stretch from heavy pulling, or using the tape at an angle.
A simple tell: measure the same span five times, re-hooking each time. If the results vary more than you can tolerate for your work, you need a better tape or a better method, often both.
How to choose the best tape measure for accurate readings by job type
There is no universal winner. The right choice depends on tolerance, environment, and whether you measure solo.
| Use case | What accuracy depends on most | What to prioritize |
|---|---|---|
| Finish carpentry, trim, cabinets | Repeatability, clean marking, minimal hook play | Stiff hook, crisp 1/16 marks, comfortable lock, compact case |
| Framing, decks, general construction | Fast reads, standout, durability after drops | Wide blade, tough coating, strong standout, easy-to-read foot markers |
| DIY home projects | Readability and ease of use | High-contrast markings, simple fractions, smooth rewind, decent standout |
| Mechanical, garage, hobby work | Short-span precision and control | Shorter tape (12–16 ft), compact body, clear 1/32 where available |
If your work involves inspection, compliance, or tight tolerance fabrication, a tape may not be the right primary tool. In those cases, a steel rule, calipers, or a laser distance meter can reduce uncertainty, and you may want to confirm requirements with a professional or your project spec.
In-store and at-home tests that reveal a tape’s real accuracy
These tests are quick, and they expose the failure points that make people keep rebuying tapes. Bring a small square or a known-straight rule if you can.
Hook play test (30 seconds)
- Wiggle the hook side to side, it should not rattle excessively.
- Pull the hook outward and push inward, movement should feel controlled and smooth.
Repeatability test (2 minutes)
- Measure a fixed object five times, re-hooking each time.
- If your readings bounce around, do not assume “you will be careful later”, you will not.
Edge-readability test (1 minute)
- Read 11 3/8, 11 7/16, 11 15/16 quickly without squinting.
- Check glare, some glossy coatings look great indoors and fail in sun.
Inside measurement sanity check (1 minute)
- Measure an inside span using the tape case as the stop.
- Use the case length printed on the tape, confirm it matches reality with a ruler if possible.
Practical tips to get accurate readings every time (even with a decent, not perfect tape)
You can buy a nicer tape and still miss marks if your method stays sloppy. These habits are boring, and they save materials.
- Burn an inch when the hook looks questionable: start at the 1-inch mark and subtract 1 inch, this bypasses hook wear.
- Use a knife line for finish work: a pencil line can be wider than your tolerance, a sharp knife line removes ambiguity.
- Control the angle: keep the blade flat to the surface, avoid measuring with the tape floating in the air.
- Standardize your reference: if two people measure, agree on where the mark lands, left edge, right edge, or center of line.
- Account for kerf: on saw cuts, decide whether you cut on the waste side or split the line, then stay consistent.
If you do repeated layout, a story stick, a scrap marked with key distances, often beats re-measuring. It reduces both reading mistakes and “I thought that was 3/4” arguments.
Common mistakes when shopping for a “more accurate” tape
Most buying mistakes come from overvaluing a single spec and ignoring how the tape behaves after real wear.
- Buying too long: a 25 ft tape sounds versatile, but if you mostly do indoor projects, a shorter tape can read cleaner and control better.
- Ignoring hook damage: the most accurate tape becomes inaccurate after a few drops if the hook bends.
- Assuming standout equals accuracy: standout helps solo measuring, but clear markings and a stable lock usually matter more for correct cuts.
- Mixing tape styles on a team: if one tape uses different labeling conventions, small misunderstandings can cost more than the tape price.
Key takeaways and a simple buying checklist
If you want the best tape measure for accurate readings, focus on repeatability, hook condition, and readability in your lighting, then match standout and durability to your job.
- Check the hook for controlled true-zero movement, avoid sloppy side play.
- Pick markings you can read fast at the fractions you actually use.
- Test repeatability before committing, even a quick five-pull test tells a lot.
- Buy for the work: finish carpentry priorities differ from framing and DIY.
Action step: if your current tape has a bent hook or unreadable blade, replace it and keep the old one as a “rough” tape for dirty jobs, that alone prevents a lot of frustrating rework.
FAQ
What makes a tape measure more accurate than another?
Usually it comes down to hook stability, blade stiffness, and how readable the graduations stay over time. Printed accuracy matters, but most day-to-day errors come from wear, glare, and small slips while marking.
Is a wider blade always better for accurate readings?
Not always. Wider blades tend to hold shape and reduce sag, which helps solo measuring, but they can be harder to control in tight spaces and may encourage twisting if you are not careful.
How do I know if my tape measure hook is throwing off measurements?
If outside measurements and inside measurements disagree in a way you cannot explain, or your readings vary when you re-hook the same edge, the hook may be bent or the rivets may have too much play.
Should I “burn an inch” all the time?
It is a good habit when the hook looks worn or you need tight tolerance, but it slows you down. Many people reserve it for finish cuts, templates, and expensive material.
Are magnetic tape measures accurate?
They can be, and the magnet helps with solo work on steel. Accuracy still depends on hook movement and how squarely the magnet seats, a crooked grab can introduce small errors.
Do tape measures stretch over time?
In many cases the blade holds up well, but heavy pulling, kinks, and repeated impact can cause issues that feel like stretch. If your tape behaves inconsistently, replacement is usually cheaper than the waste it can cause.
When should I use a laser distance meter instead of a tape?
For long interior spans, tall ceilings, or when you need a quick solo measurement without sag, a laser meter can reduce common tape errors. For critical work, confirm your method matches your project requirements.
If you are replacing a few tapes for a crew or trying to standardize on one style for fewer mistakes, it can help to pick two “lanes”, a compact high-readability tape for precise layout, and a tougher standout-focused tape for rough measuring, then train everyone to use the same marking conventions.