Using a caulk finishing tool 3 edge is one of the fastest ways to stop fighting wavy lines, smeared corners, and that annoying “why does it look worse after I touch it” moment.
If you’ve ever caulked a tub, kitchen backsplash, or window trim, you already know the real problem isn’t squeezing out caulk, it’s making the bead look clean and consistent without pulling it back out of the joint.
This guide breaks down what the three edges are actually for, how to pick the right edge for the gap you have, and a simple, repeatable method that works with common acrylic latex and many silicone caulks used in U.S. homes.
What a 3-edge caulk finishing tool actually does
A 3-edge finisher is basically a shaped spreader that compresses and profiles fresh caulk. Instead of relying on your finger to “kind of” smooth it, the tool creates a predictable concave joint, pushes material into the gap, and scrapes off excess in one pass.
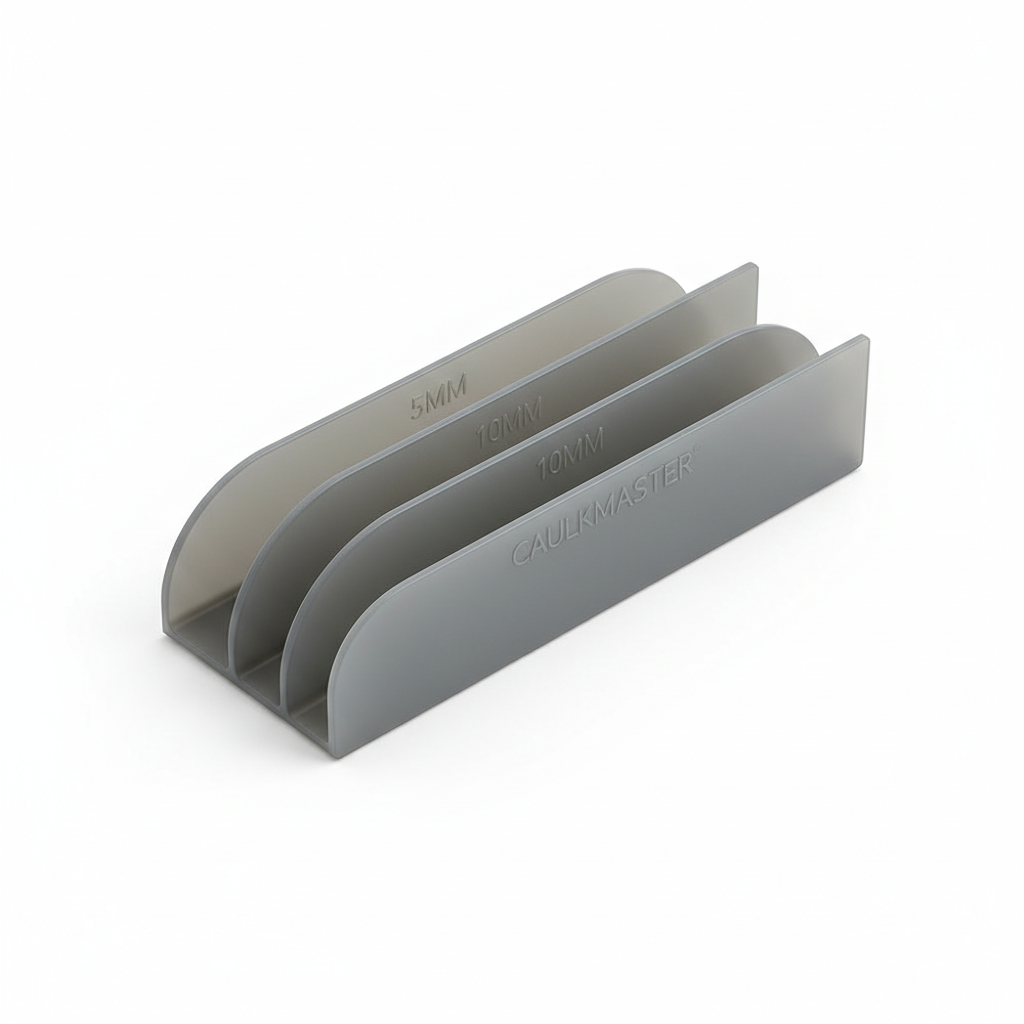
Most versions give you three radiused corners. Think of them like three “spoons” with different curve sizes. The smaller edge fits tight seams, the larger edge bridges wider gaps and leaves a broader, smoother concavity.
One more detail that matters, the tool is also a cleanup control device. When the edge is right for the bead size, you remove just the extra caulk, not the caulk you actually need for adhesion and waterproofing.
Why your caulk line looks messy (and it’s not always your technique)
People blame their hands, but in real jobs the mess usually comes from one of these situations.
- Gap mismatch: bead too big for the joint, so the finisher “plows” caulk onto the tile or trim.
- Surface contamination: dust, soap film, old silicone residue, or oil makes caulk smear instead of glide.
- Wrong caulk type for the area: for example, using paintable acrylic where constant water exposure happens, or using silicone where you plan to paint.
- Late tooling: you wait too long, skin forms, and the tool drags.
- Over-taping: tape edges lift, or you pull tape too late and tear the bead.
According to EPA, moisture control and preventing water intrusion are key factors in mold prevention, so clean caulk lines aren’t just cosmetic in wet zones, they often support better water management.
Quick self-check: which edge should you use?
Before you start, do a 30-second check. It saves you from making three passes and still not liking the result.
- Measure the gap visually: hairline to 1/8 in, around 1/8–1/4 in, or bigger than 1/4 in.
- Check the surfaces: glossy tile vs porous grout vs painted wood changes how much drag you’ll feel.
- Pick your target profile: flatter bead for paint-grade trim, deeper concave bead for shower corners (common preference).
If you’re unsure, test on a hidden 6–12 inch stretch, then commit. A caulk finishing tool 3 edge works best when you commit to one edge for one run, switching mid-line often leaves subtle steps.
Edge selection cheat sheet (with a practical table)
The exact sizes vary by brand, but the decision logic stays pretty consistent.
| Tool edge | Typical use | Best for | Common mistake |
|---|---|---|---|
| Small radius | Tight seams | Backsplashes, trim corners, small gaps | Using it on wide gaps, leaving voids |
| Medium radius | General purpose | Most baseboards, window/door casing joints | Over-pressing and scraping too much out |
| Large radius | Wider joints | Tub-to-tile, shower corners, countertop-to-wall | Leaving a bead too thick that takes longer to cure |
A small but real-world tip: if the joint is irregular, pick the edge that matches the widest section. You can always make a slightly larger profile look intentional, but you can’t hide skipped voids if your edge is too small.
Step-by-step: getting crisp lines with less mess
This is the repeatable method most DIYers end up liking because it keeps decisions simple.
1) Prep like you actually want it to stick
- Remove loose caulk and residue. Old silicone residue often needs a dedicated remover; if it still feels slick, new caulk may not bond well.
- Clean and dry the joint. In showers and tubs, let the area dry thoroughly; trapped moisture can weaken adhesion.
- If the gap is deep, consider backer rod so you don’t waste caulk filling empty space.
2) Cut the nozzle for the joint you have
- Cut small and adjust. A huge nozzle cut creates a bead you’ll fight the whole way.
- Match bead size to the edge you plan to use. If you’ll use the medium edge, don’t lay down a jumbo bead “just in case.”
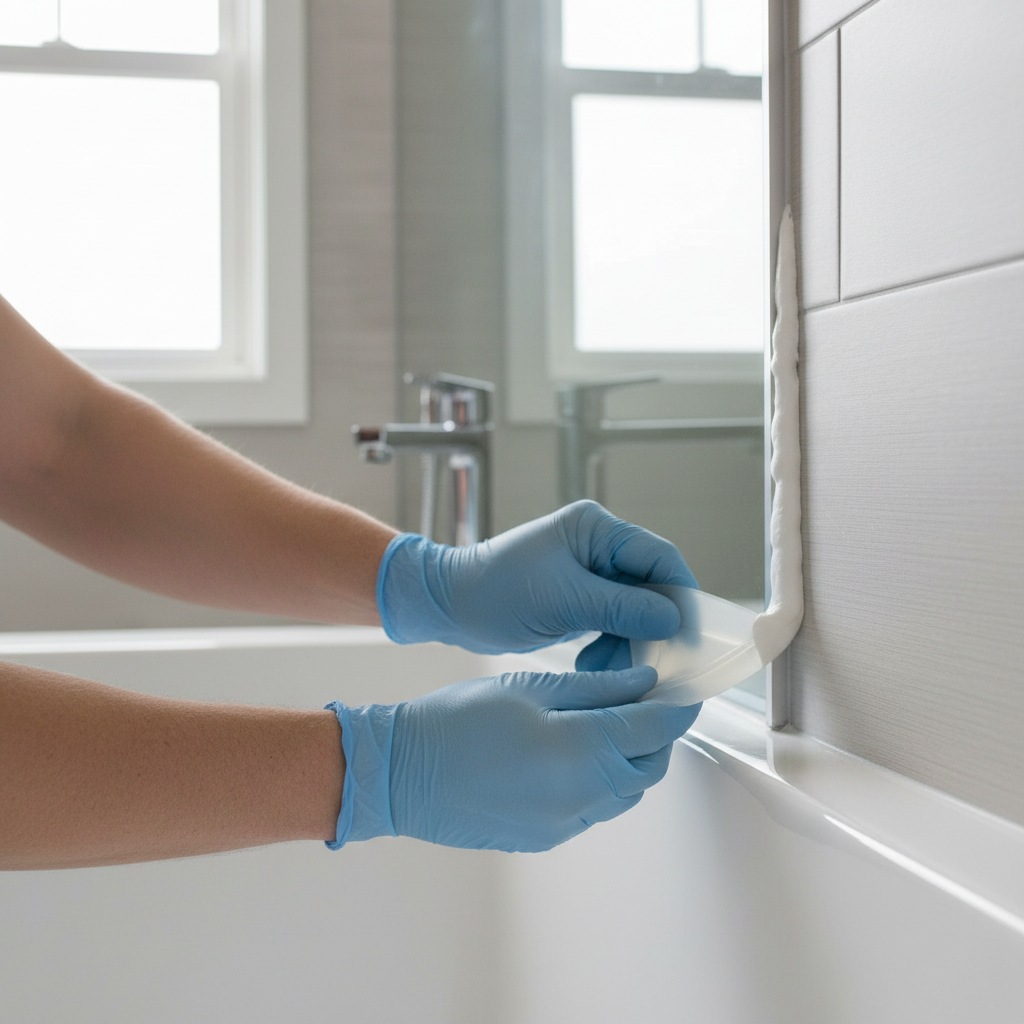
3) Apply caulk steadily, then tool immediately
- Run 2–4 feet at a time in most indoor conditions. If it’s hot or dry, shorten the run.
- Hold the tool at a consistent angle and use light, steady pressure. The tool should glide, not chatter.
- Wipe the tool edge frequently. Dried crumbs on the edge cause streaks.
4) Clean the margins without smearing
- If you taped, pull tape while caulk is still fresh, usually right after tooling that section.
- If you didn’t tape, use a damp microfiber for acrylic latex, and a caulk-safe solvent approach for silicone only if the manufacturer allows it.
According to CDC, using cleaning chemicals in enclosed spaces can irritate airways; ventilation and following the product label are sensible, and if you have sensitivities, it may be worth asking a professional for help.
Practical scenarios: choosing the tool approach by surface
Same tool, different behavior depending on what you’re sliding across.
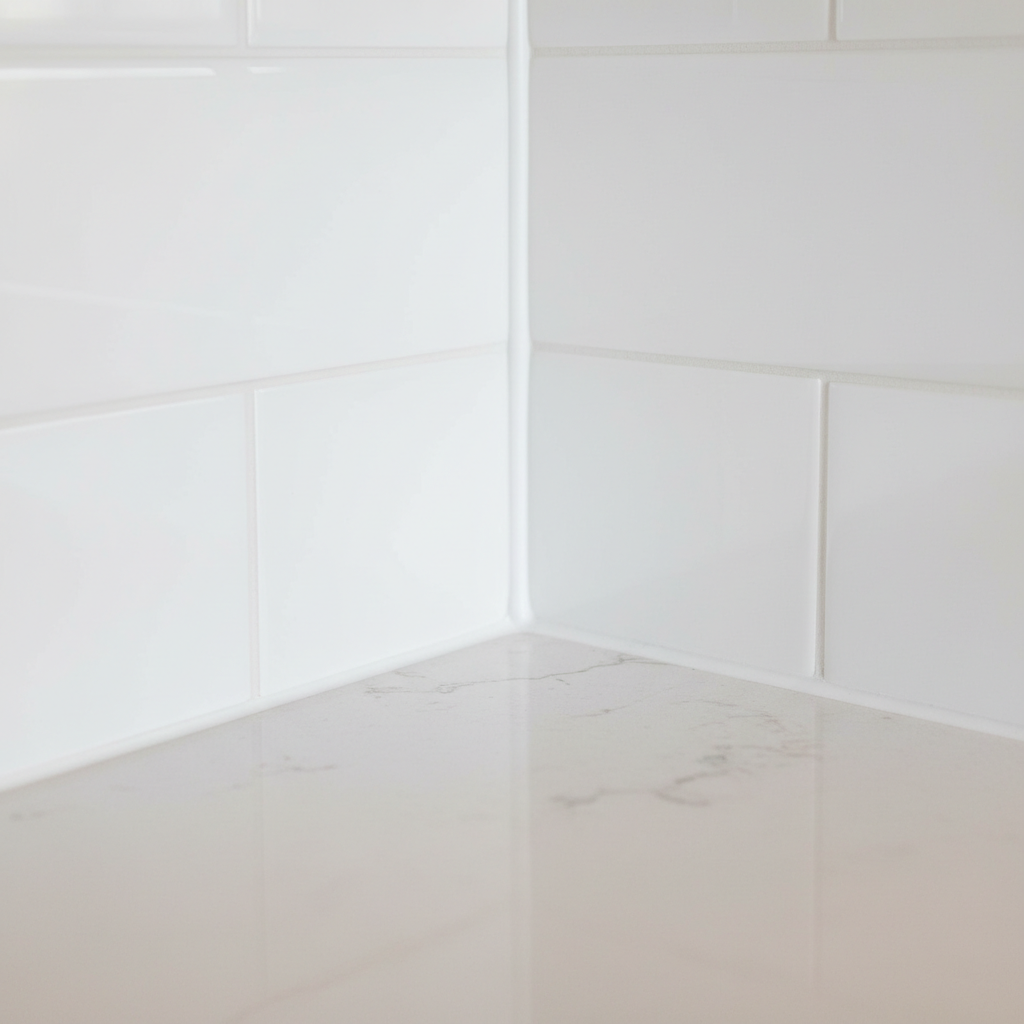
Tile and bathtub joints
These often want the larger edge because the joint is visible and takes water. Keep pressure consistent, and avoid scraping so hard that you thin the bead too much at the corner.
Painted trim and baseboards
Here, a flatter, smaller-to-medium profile usually looks cleaner under paint. If you’re painting, choose a paintable caulk and let it cure per label before priming or painting.
Backsplashes and countertop seams
These areas get wiped often, so a smooth profile matters. If you see the bead “stringing,” you may be waiting too long to tool, or the surface still has grease. Degrease, dry, then retry.
Common mistakes (and what to do instead)
- Pressing too hard: you end up starving the joint. Try lighter pressure and a slightly larger edge.
- Using water on silicone: it may bead up and cause fisheyes. For silicone, focus on steady tooling and frequent wiping rather than “wetting” everything.
- Trying to fix a half-cured bead: it looks tempting, but patching often creates lumps. Many times it’s cleaner to remove and re-run that short section.
- Ignoring cure time: a bead can look dry but still be curing. Keep water off wet-area caulk until the label cure time passes.
Key takeaways: match edge-to-gap, tool while fresh, keep the edge clean, and don’t scrape the joint empty trying to chase perfection.
When it’s worth calling a pro
If water is getting behind tile, if you see repeated mold returning despite cleaning, or if the joint is moving a lot because of structural settling, a finishing tool alone won’t solve it. In those cases, a qualified contractor or tile pro can check for substrate issues, missing waterproofing, or the need for a different joint design.
Also, if you’re working in a confined bathroom and strong odors bother you, it may be safer to choose low-odor products, ventilate aggressively, or ask a professional to handle it.
Conclusion: a cleaner bead comes from one simple habit
A caulk finishing tool 3 edge helps most when you treat it like a sizing system: pick the edge that matches the joint, lay a bead that fits that edge, and tool in short runs before a skin forms.
If you want one action step, do a small hidden test pass, then repeat that exact angle and pressure for the visible run. Consistency beats “fixing” every inch.
FAQ
What is the best way to use a caulk finishing tool 3 edge without streaks?
Streaks usually come from dried caulk buildup on the edge or uneven pressure. Wipe the tool often and keep the angle steady; if the bead is oversized, reduce the bead or move up to a larger radius.
Do I still need painter’s tape if I use a 3-edge caulk tool?
Not always. On smooth tile or finished trim, many people skip tape once they can control bead size. Tape can still help on textured surfaces or when you need a razor-straight paint line.
Which edge should I use for bathtub caulk lines?
Many tub-to-tile joints look better with the larger edge because it leaves a broader concave profile. If the gap is tight, the medium edge may fit better; the goal is full contact without scraping the corner hollow.
Can I use a finishing tool on silicone caulk?
Usually yes, but silicone behaves differently than acrylic latex. Tool it sooner, keep the edge clean, and follow the silicone manufacturer’s guidance on any smoothing liquid or solvent use.
Why does my caulk pull out when I tool it?
Common causes are pressing too hard, using an edge that’s too small, or tooling after a skin forms. Try a lighter touch, switch to a larger radius, and shorten your working section.
How do I know if I used too much caulk?
If your tool keeps dumping excess onto the surface and you have to wipe constantly, the bead is likely too big. Cutting a smaller nozzle opening and applying a narrower bead usually makes the finish cleaner.
Is it okay to recaulk over old caulk?
Sometimes acrylic over acrylic can work if the old bead is sound and clean, but silicone over old silicone often fails to bond well. When in doubt, removing old material tends to be more reliable.
If you’re trying to get a cleaner finish without wasting a whole tube, start by matching the joint size to the right edge and practicing on a short, low-visibility section. If you’d rather save time, choosing a quality finisher and the correct caulk for your surface usually makes the learning curve much less frustrating.