The best heat gun for paint stripping is the one that matches your paint type, surface, and how long you can comfortably hold it without overheating the tool or your hands. A “top-rated” model can still feel miserable on a door trim job if it has a bulky grip, awkward switches, or no usable low setting.
Paint stripping looks simple until you hit the first corner, window sash, or ornate molding. Too much heat can scorch wood or warp vinyl, too little makes you scrape for hours, and the wrong nozzle makes you chase softened paint around instead of lifting it cleanly.
This guide narrows it down with practical decision points, a comparison table, safety notes worth taking seriously, and a few field-tested tricks that usually reduce gouges and scorch marks. You’ll also see when a chemical stripper or infrared tool might be the smarter move.
What “best” really means for paint stripping (and why specs can mislead)
When people search for the best heat gun for paint stripping, they often focus on maximum temperature. In real use, control matters more than brute heat, because paint softens in ranges and surfaces react differently.
- Temperature control that you actually use: A true variable dial or multiple useful steps helps you stay just hot enough. Many jobs sit in the mid range, not at max.
- Airflow that matches the work: High airflow strips faster on flat areas, but it can blow softened paint around on detailed trim.
- Ergonomics for 20–60 minute sessions: Balance, trigger feel, and where the hot exhaust sits can make or break comfort.
- Heat stability: Cheaper units sometimes surge hot then cool, which leads to scorching followed by stubborn spots.
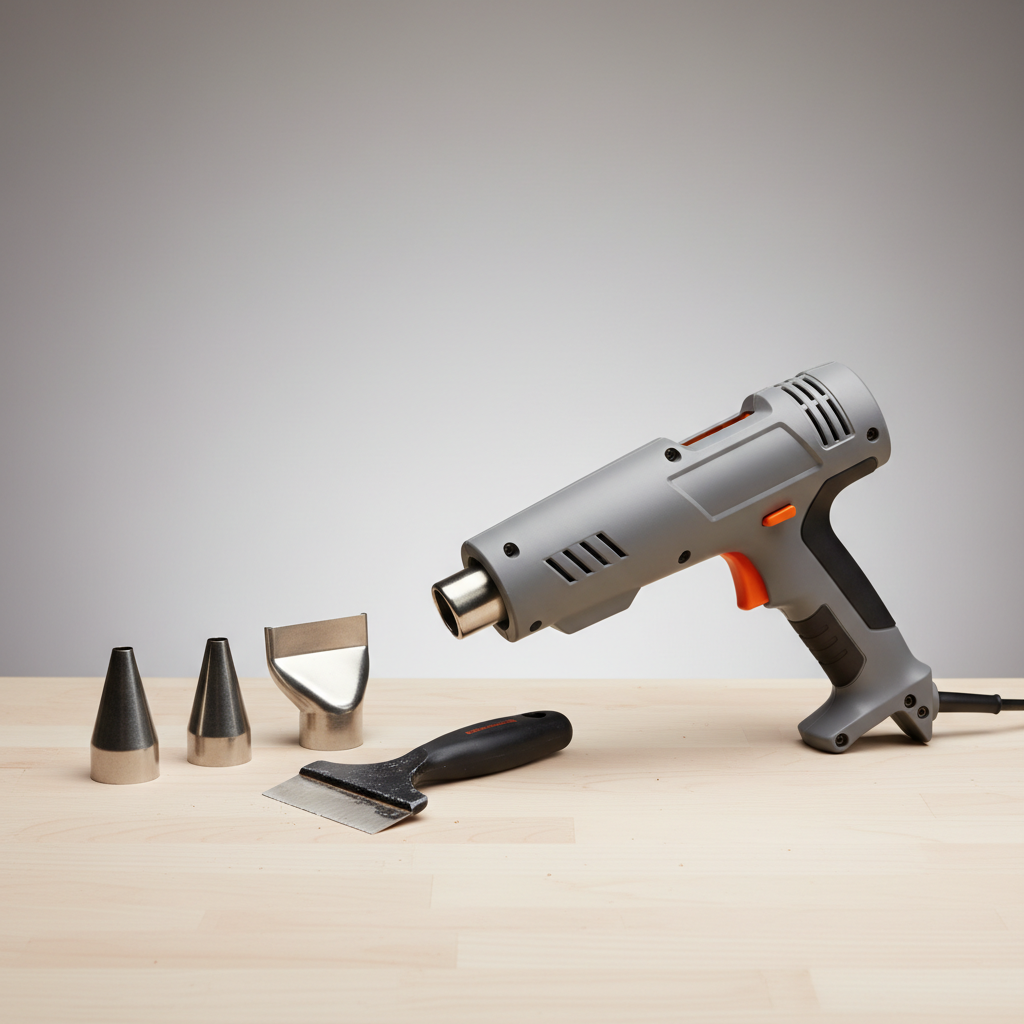
- Nozzle ecosystem: A couple good nozzles, especially a concentrator and a wide spreader, save time on edges and broad panels.
Also worth saying out loud: there’s no single perfect pick for everyone in 2026 because materials vary. Old oil paint on wood behaves differently than latex on metal, and both are different from paint on plastics.
Quick comparison table: which heat gun type fits your project?
Use this as a first pass. You can be “right” on temperature but still choose the wrong form factor for the surface you’re working on.
| Project scenario | What to look for | Why it helps | Watch-outs |
|---|---|---|---|
| Interior trim, windows, tight corners | Lower temp range + concentrator nozzle | More control, less scorching on edges | Too much airflow can blister paint unevenly |
| Flat doors, large panels | Higher airflow + wide spreader nozzle | Faster softening over broader areas | Keep moving to avoid burn marks |
| Metal railing, steel doors | Higher heat capacity + stable output | Metal sinks heat, needs consistent power | Hot metal stays hot longer, burn risk |
| Occasional DIY, small patches | 2-temperature tool, light weight | Simple, affordable, good enough | Fewer “usable” settings for delicate areas |
| Pro or frequent restoration work | Variable temp + digital display + good warranty | Repeatable results, less guesswork | More cost, more features you may not need |
Key features to prioritize in 2026 (the short list that matters)
If you only remember a few buying criteria, make it these. They’re the items that tend to show up mid-project when you’re tired and want the tool to behave.
- True variable temperature (or at least a useful low setting): Helpful for trim, adhesives, and avoiding scorched wood fibers.
- At least two airflow levels: Lower flow for detail control, higher for speed on flats.
- Overheat protection: It won’t prevent every issue, but it can reduce sudden shutdowns or tool damage.
- Comfortable grip + stable “stand” position: A heat gun that can sit safely upright matters when you need both hands for scraping.
- Included nozzles you’ll actually use: Concentrator and wide spreader are most relevant for paint; a reflector nozzle can help on pipes but is less essential.
- Service and parts availability: This matters more for frequent use; for occasional jobs it’s nice but not always decisive.
Digital displays can be useful, but don’t overvalue them. Repeatable settings are nice, yet technique and distance from the surface still drive outcomes.
Self-check: which heat gun profile matches your situation?
Before you chase “the” best model, get clear on what you’re stripping and where. These questions usually prevent a regret purchase.
Surface and paint questions
- Is the surface wood, metal, masonry, or plastic/vinyl? Plastics and vinyl often deform early, which may push you toward chemical stripping or very low heat.
- Is the paint likely older than 1978? If yes, treat it as potential lead paint until you confirm otherwise.
- Are you removing multiple layers or just one top coat? Thick build-up favors steady heat and good airflow control.
Work environment questions
- Are you indoors with limited ventilation, or outdoors? Indoors increases the importance of containment and proper PPE.
- Do you need one-handed control on ladders or overhead areas? Lighter tools and better balance become non-negotiable.
- Do you have outlets, or are you considering cordless? Cordless can be convenient but may deliver less run time at high heat depending on battery system.
If your answers lean toward delicate surfaces, old homes, or long sessions, that’s when the best heat gun for paint stripping tends to mean “more control and better ergonomics,” not “hottest possible.”
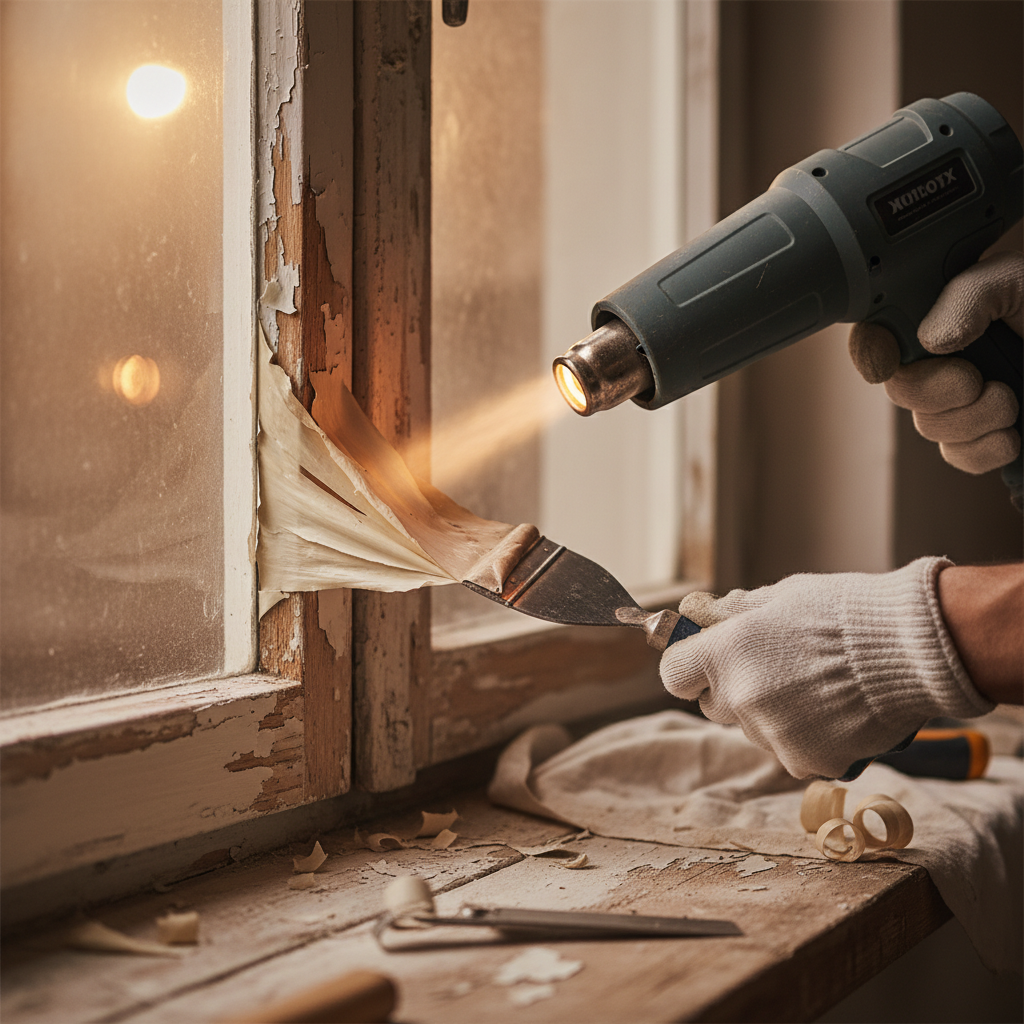
How to strip paint with a heat gun without scorching (a practical workflow)
This is the routine that usually keeps the work predictable. It’s not fancy, just disciplined.
- Prep the area: Clear flammables, cover floors, and keep a metal tray or safe resting surface for the hot tool.
- Start lower than you think: Begin at a moderate temperature and adjust upward only if paint stays hard.
- Work in small zones: A 6–10 inch section is easier to manage than heating an entire panel at once.
- Keep the gun moving: Hover and sweep, don’t “park” the heat in one spot unless you’re on metal and watching closely.
- Watch the paint response: You want softening and slight bubbling, not smoking or charring.
- Scrape with the grain: On wood, a sharp scraper at a shallow angle reduces gouges.
- Follow with cleanup: Expect a second pass with sanding or a chemical wash depending on the paint type and the final finish.
Key point: Distance and dwell time matter as much as the temperature setting. If you’re scorching, step back an inch and keep moving before you crank down the dial.
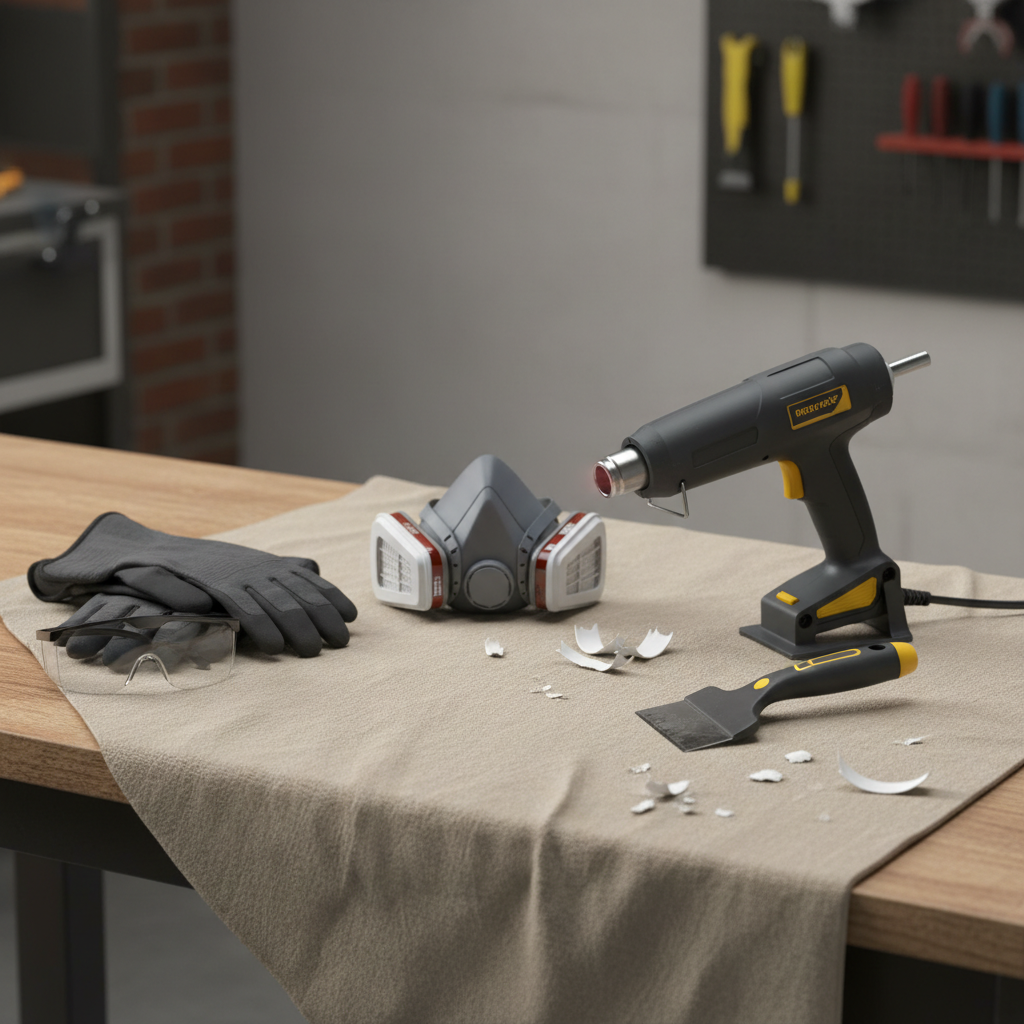
Safety, fumes, and lead paint: what to take seriously
Heat guns can release unpleasant fumes and, in some situations, potentially hazardous dust when paint is disturbed. This is where “DIY confidence” can turn into a bad afternoon, so it’s worth slowing down.
- Ventilation: Use cross-ventilation and consider a fan exhausting to the outdoors. If you can’t ventilate well, a different method may be safer.
- PPE: Gloves, eye protection, and a respirator appropriate for particulates and fumes are common recommendations; if you’re unsure, ask a professional or your local hardware pro for guidance.
- Fire risk: Heat guns can ignite dust, dried finishes, or nearby materials. Keep a fire extinguisher nearby and never leave the tool unattended while hot.
According to U.S. EPA, homes built before 1978 may contain lead-based paint, and renovation work can create lead dust. If lead is possible, consider lead test kits and lead-safe work practices, and when in doubt, consult a certified professional.
Also, some paints and substrates can off-gas when overheated. If you notice strong odors, smoke, or eye/throat irritation, stop and reassess the approach.
Common mistakes that waste time (and how to avoid them)
A few predictable missteps tend to make people conclude they bought the wrong tool, when the real issue is method.
- Cranking heat to max immediately: Often leads to scorching on wood and a gummy mess on latex.
- Using the wrong scraper: Dull blades force pressure, pressure causes gouges, then you spend time repairing wood.
- Heating too large an area: Paint cools and re-hardens before you scrape it, so you redo work.
- Ignoring nozzle choice: A concentrator can help on corners, a wide nozzle reduces striping on broad panels.
- Skipping cleanup steps: Even if you remove paint well, residue and softened layers can interfere with primer adhesion.
If you’re fighting sticky paint that smears, try a slightly lower temperature, more movement, and a sharper scraper edge. It sounds backward, but it often works.
When a heat gun is not the best choice
Sometimes the smartest “upgrade” is switching methods. The best heat gun for paint stripping still has limits, especially on sensitive materials.
- Vinyl siding, many plastics, PVC trim: Heat can warp these quickly, sometimes before the paint softens much.
- Intricate carvings: You may get better results with a chemical stripper and detail brushes.
- Lead paint risk in enclosed spaces: Lead-safe removal often calls for stricter containment and methods that reduce dust and fumes, which may mean hiring a certified pro.
- Historic windows: Heat can damage glazing putty or crack glass if misused; infrared tools are sometimes preferred by restoration folks, but results vary.
If you’re unsure, test a small, hidden area first. A 10-minute test can save hours of repair.
Conclusion: how to pick your best heat gun for paint stripping
If you want one clean takeaway, choose for control and comfort first, then power. For most homeowners, a variable-temperature heat gun with two airflow levels and a couple of useful nozzles covers doors, trim, furniture, and railings without feeling like a wrestling match.
Your next step can be simple: write down the surface type, whether the home predates 1978, and whether you’ll work on detailed trim or large flats, then buy the tool that matches that reality rather than a spec sheet.
If you’re between two options, pick the one that feels safer to use for an hour straight, because paint stripping rarely ends in ten minutes.
FAQ
What temperature is best for stripping paint with a heat gun?
It depends on paint type and surface, but many jobs work best in a moderate range where paint softens without smoking. Start lower, then increase gradually if removal stays slow.
Is a 2-temperature heat gun enough for DIY paint stripping?
Often yes for flat surfaces and occasional use, especially if the low setting is truly usable. If you plan to do trim, windows, or multiple rooms, variable control tends to feel worth it.
Can I use a heat gun to remove paint from wood without burning it?
Usually, but you need movement, distance control, and sharp scraping. Burning is more likely when you park the nozzle, push max heat, or work too close on softwoods.
What nozzles help most for paint stripping?
A concentrator nozzle helps focus heat into corners and along edges, while a wide spreader covers flat panels more evenly. If your kit includes lots of specialty tips, you may still only use these two most days.
Do I need a respirator when using a heat gun on paint?
In many cases it’s a good idea, especially indoors or with older coatings, because fumes and dust can irritate lungs. If lead paint is possible, take extra precautions and consider professional advice.
Is a cordless heat gun good for stripping paint?
Cordless models can be convenient for ladders and quick patches, but sustained high-heat runtime varies a lot by battery platform. For long stripping sessions, corded remains the more predictable choice for many users.
What’s the best way to avoid gouging the wood while scraping?
Keep the scraper sharp, use a shallow angle, and let heat do the work. If you find yourself forcing the blade, the paint probably needs a few more seconds of gentle heat.
If you’re trying to choose a tool quickly, focus on your most common surface and the level of detail you’ll strip, then narrow to a heat gun with usable low heat, stable output, and the nozzles you’ll realistically reach for. That approach tends to save money and frustration more than chasing a “most powerful” label.